
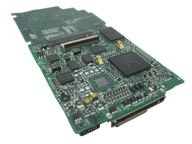
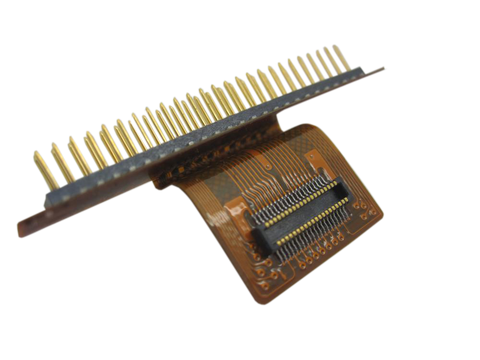
Representative photo. You receive the part named above.
iPod Mini 2nd Generation — Replacement Logic Board
Used (Apple Original) · Model A1051
$60.95
Sold out
Not for sale right now
We are not selling this part at the moment.
- Used (Apple Original). Tested: installed in a working iPod and checked before it ships.
- 1-year limited warranty · 30-day returns from delivery
- Free pry tool in the box
- Completed repairs aren't refundable. If a part we fitted fails within a year, we repair it again.
Part details
About this part
Overview
Replacement logic board for iPod Mini 2nd Generation. It ties together power, storage, connection, display, audio, and controls, so use it after the easier connected parts, cables, and connectors have been checked.
Fitment snapshot
Product Overview
This logic board listing covers Replacement Logic Board and its own connector path on the iPod Mini 2nd Generation.
Use Part Details for the confirmed part-number reference. Use the Compatible Variants table below to confirm capacity, color, or order-number fitment.
Choose this part when your iPod shows Folder Icon, Sad iPod Icon, Dropped / Not Working, or Overheating; the checks below help confirm the right part before you order. A folder with an exclamation mark means the iPod cannot find its storage — the drive, its ribbon cable, or the software on it; a sad-face iPod icon is the same message in the older style. Both start as storage faults, so the board is the last suspect on that path, not the first.
If known-good cable, power, storage/ribbon, connection, and restore or Disk Mode checks still fail, the logic board remains a suspect, especially when corrosion or board-side connector damage is visible.
What Is Included
Condition: Used factory-original part. Quantity and exclusions: The listed part, set, pair, or configuration above is supplied with exactly one plastic pry tool. No other parts, tools, adhesives, or materials are included unless they are explicitly listed above.
Quick Buying Check
Buy this when
- Folder Icon: Use the logic-board check only after battery, storage, display, controls, audio/Hold, dock, and connector assemblies are ruled out on this model.
Identify the board before you buy
- Confirm the generation first, because the model number cannot: both mini generations print A1051. This generation has its capacity — 4 GB or 6 GB — engraved on the back panel and carries EMC 2044; the first-generation mini has no capacity engraving and carries EMC 1984. A 6 GB size exists only on this generation.
- Then read the board itself. Two Apple numbers exist for this generation,
820-1648-Aand820-1804-A; both are 2nd-generation boards and either fits any 4GB or 6GB unit — the capacity lives on the drive, not the board. This page sells that one board and no other. - Never buy a mini board on "A1051" alone. The number is identical across both generations and identifies nothing.
Diagnose first when
- Confirm the capacity match before ordering: 4GB, 6GB.
- Test with a known-good charger and cable before opening the iPod.
- Test the battery, cable, storage, screen, headphone assembly, or dock connector first.
- If the failure appeared right after service, reopen and inspect connector seating before buying a board.
Fit and specs
Specifications & Fitment
Part Details
| Detail | Value |
|---|---|
| Model Number | A1051 |
| EMC | EMC 2044 |
| Condition | Used — factory original Apple part. Normal cosmetic wear expected. |
| SoC | PortalPlayer PP5022 |
| CPU | Dual ARM7TDMI, 80 MHz |
| RAM | 32 MB (Samsung K4S56163PF) |
| Audio Codec | Wolfson WM8731 (marked WM8731L) |
| PMU | NXP PCF50605HN |
| FireWire Transceiver | TI TSB41AB1 |
| DC-DC Converter | NXP TEA1211 |
| LCD Controller | Renesas HD66753 |
| OEM Part |
820-1648-A, 820-1804-A
|
Compatible Variants
| Order Number | Capacity | Color | Case | Compatible | Notes |
|---|---|---|---|---|---|
| M9802LL/A | 4GB | Blue | — | Yes | — |
| M9806LL/A | 4GB | Green | — | Yes | — |
| M9804LL/A | 4GB | Pink | — | Yes | — |
| M9800LL/A | 4GB | Silver | — | Yes | — |
| M9803LL/A | 6GB | Blue | — | Yes | — |
| M9807LL/A | 6GB | Green | — | Yes | — |
| M9805LL/A | 6GB | Pink | — | Yes | — |
| M9801LL/A | 6GB | Silver | — | Yes | — |
Install and repair
Install Overview
Before You Start
Turn Hold off, then reset: toggle Hold on and off and hold Menu + Select for about 6 seconds, until the Apple logo appears. Guides that say Menu + Play describe the older, pre-click-wheel iPods. Confirm the model and variant before opening the iPod.
Treat case opening as the highest handling risk. Work around the seams gently and stop if the shell, clips, or internal stack resist.
Do not pull the halves apart or side-load board sockets. Reseat nearby ribbons and connectors before blaming a replacement logic board.
Test known-good replaceable assemblies first so the board is not blamed for a battery, storage, cable, control, screen, or audio path.
Open ribbon-cable latches only as described; over-lifting or side-loading the latch can damage the connector.
Repair steps
Documented repair-procedure steps for replacing the logic board on this model (from teardown guides; confirm against your unit before starting):
- Carefully disconnect the battery from the logic board. Make sure to pull only on the connector and not on the battery wires.
- Carefully slide the iPod out of its casing by pushing on the logic board near the bottom edge of the click wheel.
- Use a spudger to carefully pry up the headphone jack board from the logic board. Be careful to pry up near the connector to prevent unnecessary strain on the board.
- Do not pull on the headphone jack board at the top of the iPod, as the connector to the logic board is fragile.
Disassembly Guide
Disassembly guide summary: iPod Mini Logic Board Replacement.
Show all 19 installation steps
Confirm that the hold switch is locked before you open the iPod.
Carefully slide a small flathead screwdriver or Jimmy into the seam between the metal casing and white plastic top. Lever up the white top bezel, taking care not to damage the soft plastic. The top bezel is adhesive-backed, so you may need to lever it up from several spots before it releases. Heat up the adhesive for a few seconds with a hair dryer on low heat to make the job easier.
Raise the top bezel off the iPod.
Carefully slide a small flathead screwdriver or Jimmy into the seam between the metal casing and white plastic bottom. Lever up the white bottom bezel, taking care not to damage the soft plastic.
A small pair of snap-ring pliers is the best tool to take out the metal retaining bracket. You can also lever out the metal retaining bracket beneath the bottom bezel with a flathead screwdriver. Release the bracket by pressing in the corner metal arms first.
Lift the released bracket away and set it aside.
In this step, be careful, this connector is fragile. With a spudger or fingertip, carefully disconnect the orange click wheel ribbon from the logic board.
Take out the 2 #00 Phillips screws securing the headphone jack to the casing.
Carefully move the iPod out of its casing by pressing on the logic board near the click wheel's bottom edge. Do not tug on the headphone jack board at the iPod top; its logic board connector is fragile.
After the logic board has been pushed out far enough, gently grip it on either side of the display and keep sliding the iPod from its casing.
Raise the battery off the logic board and set it to the side of the iPod.
With a spudger, flip up the black plastic tab securing the orange display ribbon in place. The black tab can rotate up 90 degrees, releasing the ribbon cable. This tab is fragile so take care not to break it.
In this step, note the location of the four white plastic clips securing the display to the logic board. These clips must be released before the display can be removed.
With a spudger or fingertip, release the four white plastic tabs.
In this step, turn the iPod over. Carefully raise the display up and move it out of its connector.
With a spudger, carefully lever up the headphone jack board from the logic board. Be cautious to lever up near the connector to prevent unnecessary strain on the board.
Carefully detach the battery from the logic board. Make sure to draw only on the connector and not on the battery wires.
With a spudger or fingertip, carefully disconnect the orange hard drive ribbon from the logic board. Raise the hard drive out of the iPod.
The logic board is the remaining assembly.
Product-specific placement, reassembly, and check
- Prepare and access. Confirm the exact model and listing fit first. Use the existing steps as a disassembly guide, gather the specified tools, disconnect power where applicable, and keep screws and cable positions organized.
- Place Replacement Logic Board. Install only the exact board variant after every adjacent cable and assembly has been isolated, then reconnect each interface in its original position.
- Reassemble without force. Reverse only the access steps needed for this repair, keep cables clear of case edges and screw posts, and close clips in stages.
- Validate before final closure. Before final closure, validate startup, charging, storage recognition, display, audio, and controls; a generic symptom alone is not proof of a board fault.
Stop condition: Stop if a connector, latch, screw, clip, housing edge, or the replacement part resists normal alignment. Recheck model fit, orientation, cable routing, and trapped hardware instead of forcing it.
After This Repair
| Check | What to do |
|---|---|
| Run the full function check | Verify power, USB sync, storage, display, audio, controls, and charging before treating the repair as finished. |
| Still not working? | Go back through the connected battery, storage, display, dock, audio, and control paths one at a time. |
Troubleshooting
Diagnostic Failure Cards
Use these model-specific failure cards to decide whether this logic board is the right part, a nearby part needs checking first, or escalation makes more sense after simpler checks.
| Symptom | What it means & what to check |
|---|---|
| Symptom remains after basic checks |
What you may see: The iPod still points back to Replacement Logic Board after cable seating, battery stability, and nearby connector checks. Check first: Retest with known-good cables or adjacent parts where practical before ordering. Check next: A nearby cable, connector, battery, storage device, display path, audio path, or board path can mimic a bad logic board. |
| Symptom changes when touched or reseated |
What you may see: The symptom changes after moving the part, reseating a cable, or applying light pressure near the connector path. Check first: Inspect the connector, latch, flex, solder joints, and nearby board area for damage or corrosion. Check next: This can still be a connection issue rather than a failed logic board alone. |
| Problem began after another repair |
What you may see: The issue started immediately after opening the iPod, replacing another part, or disturbing an internal cable. Check first: Reopen only as far as needed and inspect the exact area touched during the previous repair. Check next: Post-repair symptoms often trace to seating, latch, screw, or cable issues before Replacement Logic Board itself is confirmed bad. |
| Fitment or model-variant mismatch |
What you may notice
Diagnose first when
Similar issues to separate
Where this logic board does not fit
Check another part first
Repair or replacement paths
|
| Logic Board appears unresponsive or intermittent |
What you may notice
Diagnose first when
Similar issues to separate
Check another part first
Repair or replacement paths
|
| Symptoms changed after repair or reassembly |
What you may notice
Diagnose first when
Similar issues to separate
Check another part first
Repair or replacement paths
|
| Hold, lock, or input state can mimic another failure |
What you may notice
Diagnose first when
Similar issues to separate
Check another part first
|
| Blank, white, black, lined, or backlight display |
What you may notice
Diagnose first when
Similar issues to separate
Check another part first
Repair or replacement paths
|
| Dock, USB, sync, or charging connection trouble |
What you may notice
Diagnose first when
Similar issues to separate
Check another part first
|
| Headphone output compared with dock or line-out audio |
What you may notice
Diagnose first when
Similar issues to separate
Check another part first
Repair or replacement paths
Cautions
|
| Power, charging, or runtime symptoms |
What you may notice
Diagnose first when
Similar issues to separate
Check another part first
Repair or replacement paths
|
| Ribbon, storage connector, or ground-path checks |
What you may notice
Similar issues to separate
|
| Storage warning symptoms usually start with drive or cable checks |
What you may notice
Diagnose first when
Similar issues to separate
Check another part first
Repair or replacement paths
|
| Liquid, corrosion, or residue context |
What you may notice
Similar issues to separate
|
| Fitment and inspection notes |
Do Not Buy / Problems This Logic Board Does Not Fix
| Situation | Start here instead |
|---|---|
| Variant or capacity does not match this listing | This is a different model — check your order number and generation before ordering. |
| A replaceable attached-part path is isolated | This is a different model — check your order number and generation before ordering after matching the exact symptom and part family. |
| Recent service or connector disturbance is the main clue | Reopen carefully, reseat the part that was disturbed, and inspect its latch before buying a board. |
| You see a folder icon, clicking noise, or restore failure | A folder with an exclamation mark means the iPod cannot find its storage. Check the drive or flash media, storage cable, adapter seating, formatting, and restore path before replacing any part. |
| The problem is the Hold switch or headphone jack, not this part | Diagnose the headphone-jack / Hold switch assembly and its connector before choosing another part. On this model the Hold switch is part of that assembly, and the jack board plugs into this logic board rather than being soldered to it. |
| The computer does not see the iPod | Almost all of those checks are free and belong to the cable, the USB port and the host computer, not to this board — see the sync FAQ on the microdrive or refurbished pages. Come back here only when a known-good cable and a second computer both fail. Bent or corroded pins are on the 30-pin port itself, which is part of the logic board on this model — the metal dock-port bracket only locates it, so a damaged port is a logic-board or mail-in repair. |
| Only the screen is affected and everything else works | Start with the screen, display ribbon, and backlight path before replacing the logic board. |
| Charging, swelling, runtime, or power is the primary problem | Start with the battery, charger, port, and power-connector checks before replacing the logic board. |
| Sound is the only problem | Start with the headphone jack / Hold switch assembly check after matching the exact symptom and part family. |
Worth Knowing
- PortalPlayer PP5022 — SoC — dual ARM7TDMI, 80 MHz, 0.13 um die shrink of PP5020
- Wolfson WM8731 (marked WM8731L) — DAC-only stereo audio codec (no ADC, no headphone amp)
- Philips/NXP PCF50605HN — PMU — multi-domain voltage regulation, RTC, power sequencing, 3-wire battery charge
- Philips/NXP TEA1211 — Auto buck-boost DC-DC converter, I2C programmable, 2.55-5.5V input
- Texas Instruments TSB41AB1 — IEEE 1394a (FireWire 400) single-port cable transceiver
- Samsung K4S56163PF — 32 MB SDRAM
- Renesas HD66753 — Grayscale LCD controller/driver
- Synaptics T1005 — Capacitive click wheel ASIC, SPI interface
What Owners Report
These are anecdotal owner reports, not guarantees or authoritative proof that a particular part will fix a symptom. Use them as a troubleshooting starting point: confirm the symptom, run the quick checks, then match the fix.
Which mini is this, and which parts swap
Symptoms. An owner reads a model number off the back panel and asks which mini generation it belongs to; another, weighing the two generations, asks what actually differs and whether a battery from one fits the other.
Quick diagnosis.
- Every iPod mini carries the same model number — A1051, on both generations — so the number alone cannot answer the question. A reading like "A1050" is worth re-checking against the engraving, because A1051 is what the mini family prints.
- The reliable external tell is the capacity engraving: 4 GB or 6 GB printed on the back means this model; no capacity printed means the first-generation mini. This generation shipped in Silver, Blue, Pink and Green, with the click-wheel button text matched to the case color; the first-generation mini has gray inset wheel text on every color, no capacity engraving, and the Gold color this generation dropped.
- Backup discriminators for a worn back panel: the EMC number (EMC 2044 here, EMC 1984 on the first-generation mini), a 6 GB capacity (this generation only), or the order number (M9800LL/A, M9802LL/A, M9804LL/A, M9806LL/A — Silver, Blue, Pink, Green at 4 GB; M9801LL/A, M9803LL/A, M9805LL/A, M9807LL/A the same colors at 6 GB — an even final digit means 4 GB, odd means 6 GB).
What swaps, and what does not.
- Battery: shared — packs interchange between the two mini generations (the EC003/EC007 class); owners in this thread and the parts record agree.
- Drive flex cable and headphone jack: shared — the drive flex cable is one part for both mini generations (owner-verified), as is the headphone-jack assembly (820-1597-A).
- Click wheel: generation-matched only — wheels do not interchange between the generations in either direction. This generation's wheel is 632-0303-A, sold per case color; color-matched button text is its signature.
- Display: generation-matched by the printed-capacity rule — a screen pulled from a donor with no capacity mark on the back belongs to the first-generation mini and is the wrong part here; a donor engraved 4 GB or 6 GB matches.
- Logic board: two part numbers, both this generation — 820-1648-A and 820-1804-A are both 2nd-generation boards and either fits any 4GB or 6GB unit; the capacity lives on the drive, not the board.
Cautions.
- Never buy boards or wheels on "A1051" alone — the number is identical across both generations and identifies nothing. Insist on the capacity-engraving or EMC discriminator before paying for a generation-matched part.
Community signal. Reported by 2 owners.
Questions
Frequently Asked Questions
Use these questions to narrow the part path before ordering. They keep each answer focused on a different diagnostic or fitment decision.
What iPod Mini 2nd Generation models does this fit?
This Replacement Logic Board fits: M9800LL/A (4GB Silver), M9802LL/A (4GB Blue), M9804LL/A (4GB Pink), M9806LL/A (4GB Green), M9801LL/A (6GB Silver), M9803LL/A (6GB Blue), M9805LL/A (6GB Pink), M9807LL/A (6GB Green).
Do I need to solder?
No, this installation does not require soldering. Difficulty: Moderate. Estimated time: 30 minutes - 1 hour.
How do I know if this logic board needs replacement?
These symptoms require exact-model diagnosis first; consider the logic board only after power, storage, cable, display, audio, and control checks isolate a board fault. Check fitment, connectors, and nearby parts before treating symptoms as proof.
What else should I replace at the same time?
Logic board replacement often reveals battery issues — inspect during service. Display connector on the logic board should be inspected during replacement.
Can water damage, liquid, or corrosion make this logic board the right repair path?
Look for visible liquid residue, corrosion, burned parts, lifted pads, or damaged board connectors. Do not use a parts swap as the only test when liquid damage is present; clean and inspect the board path first. Choose this logic board only when the failure is isolated to the board path after external and replaceable-part checks. Check the nearby part path first when the symptom still fits a battery, storage, display, dock, headphone/hold, or click-wheel assembly. Board-level rework and component diagnosis belong in advanced or professional repair context.
Is this for a full-size hard-drive iPod?
The iPod mini is a separate Apple product line from full-size hard-drive iPods. This is the iPod mini 2nd Generation.
You May Also Want
Logic board replacement often reveals battery issues — inspect during service.
Related: Flash Mod Service (installed by iMods)Flash storage is the common upgrade: we fit it by mail.
Related: Replacement LCD Screen (1.67" Grayscale)Display connector on the logic board should be inspected during replacement.
Search terms
Some buyers search for "Apple Logo Frozen On"; confirm the checks above point to this same part before ordering.
Why people land on this part
Some buyers search for "no sound", "wont sync", or "works only plugged"; confirm the checks above point to this same part before ordering.
Also searched as: ipod mini 2nd generation logic board replacement, Dropped / Not Working, Overheating, dead logic board, no power logic board, won't turn on logic board, backlight will not turn on, backlight won't go on, board make, examine board, board broken, motherboard.
Free diagnostic
Broken iPod? We can help.
Mail us your iPod and we will test it and send you a free repair quote. If you don't like our price, we will ship your iPod back at our expense.
How mail-in repair works
Order the free diagnostic
Choose your iPod. Add our shipping box and prepaid label if you need one.
Mail us your iPod
Pack it with your work order. No printer? Put a note in the box with your name, return address, email, order number and what is wrong.
Approve your quote
We test it and email your free repair quote. Most repairs are finished within 3 to 5 business days after you approve the quote.