
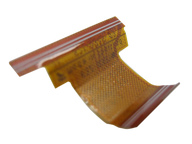
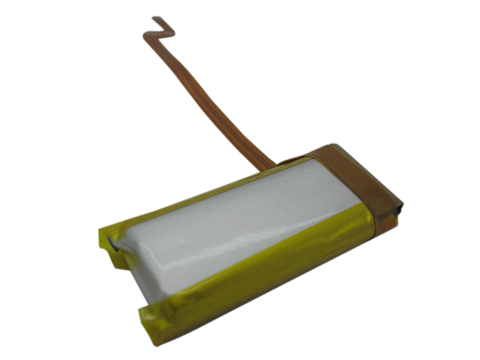
Representative photo. You receive the part named above.
iPod Classic 6th Generation 80GB / 120GB Thin Hard Drive Cable Replacement
Used (Apple Original) · Model A1238
$39.90
Sold out
Not for sale right now
We are not selling this part at the moment.
- Used (Apple Original). Tested: installed in a working iPod and checked before it ships.
- 1-year limited warranty · 30-day returns from delivery
- Free pry tool in the box
- Completed repairs aren't refundable. If a part we fitted fails within a year, we repair it again.
Part details
About this part
Overview
Replacement ZIF hard-drive flex cable for thin-case iPod Classic 6th Generation 80GB and 120GB models. Use this listing for MB029LL/A, MB147LL/A, MB562LL/A, or MB565LL/A after confirming 10.5 mm rear case depth, cable marking, and storage behavior.
Fitment snapshot
A1238 / EMC 2173 are shared across Classic-family routes; verify capacity, order number, rear-case depth, and cable marking before ordering.
Product Overview
This ZIF hard-drive flex cable connects the storage drive or flash adapter to the logic board inside thin-case iPod Classic 6th Generation 80GB and 120GB models.
This listing covers iPod Classic hard drive cable replacement for 6th Generation thin models: MB029LL/A, MB147LL/A, MB562LL/A, and MB565LL/A. The part is also called the hard drive ribbon cable, HDD flex cable, HDD ribbon, drive flex cable, or iPod Classic ribbon cable.
Use this listing when storage behavior points toward the cable: Red X, sad iPod, folder icon, clicking, restore errors, disk-mode trouble, corrupted data, or a flash adapter that is not recognized after seating checks.
Match the cable to the installed storage, not the case alone: original thin 80GB and 120GB drives and flash-storage adapters use this thin ZIF ribbon. A flash build in the thick 160GB uses the thin ZIF ribbon (sold separately); the 821-0546 CE-ATA cable only fits the original drive.
Choose Your Option
This part comes in multiple variants. Confirm your iPod's capacity, case depth, and order number before ordering.
Choose this listing for 80GB or 120GB thin-case builds with a 10.5 mm rear case. Open the child page before ordering so the installed cable marking and case depth both match.
You're viewing this optionUse this linked storage option only for original 2007 thick 160GB thick-case iPods and the order numbers shown here.
View this option →What Is Included
Condition: Used factory-original part. Quantity and exclusions: The listed part, set, pair, or configuration above is supplied with exactly one plastic pry tool. No other parts, tools, adhesives, or materials are included unless they are explicitly listed above.
Fit and specs
Specifications & Fitment
Part Details
| Detail | Value |
|---|---|
| Model Number | A1238 |
| EMC | EMC 2173 |
| Condition | Used — factory original Apple part. Normal cosmetic wear expected. |
| Reference Cable Numbers | Toshiba-drive thin-cable family — 632-0337 / 821-0386-03 / 821-0728-01. A Hitachi-marked cable (632-0340 / 821-0387-03) is the other family; contact us before ordering. |
| Compatible Storage | 80GB / 120GB thin ZIF hard-drive path |
| Connector Type | 40-pin ZIF hard-drive cable |
| Wrong Cable Warning | The thick 160GB CE-ATA cable path is not compatible with this page |
Compatible Variants
| Order Number | Capacity | Color | Case | Compatible | Notes |
|---|---|---|---|---|---|
| MB147LL/A | 80GB | Black | thin (0.41 in) | Yes— stock match | — |
| MB029LL/A | 80GB | Silver | thin (0.41 in) | Yes— stock match | — |
| MB565LL/A | 120GB | Black | thin (0.41 in) | Yes— stock match | — |
| MB562LL/A | 120GB | Silver | thin (0.41 in) | Yes— stock match | — |
| MC297LL/A | 160GB (Late 2009) | Black | thin | Yes— fits | Fits the Late-2009 thin 160GB (MC293LL/A / MC297LL/A); that model is sold under the iPod Classic 7th Generation (Late 2009) pages. |
| MC293LL/A | 160GB (Late 2009) | Silver | thin | Yes— fits | Fits the Late-2009 thin 160GB (MC293LL/A / MC297LL/A); that model is sold under the iPod Classic 7th Generation (Late 2009) pages. |
| MB150LL/A | 160GB | Black | thick (0.53 in) | Check— flash builds only (thin ZIF ribbon) | 2007 160GB thick models (MB145LL/A, MB150LL/A, 13.5 mm case): the original CE-ATA drive requires the thick 160GB CE-ATA cable 821-0546, not this cable. A flash conversion in that shell uses this thin ZIF ribbon. |
| MB145LL/A | 160GB | Silver | thick (0.53 in) | Check— flash builds only (thin ZIF ribbon) | 2007 160GB thick models (MB145LL/A, MB150LL/A, 13.5 mm case): the original CE-ATA drive requires the thick 160GB CE-ATA cable 821-0546, not this cable. A flash conversion in that shell uses this thin ZIF ribbon. |
Install and repair
Repair considerations
Run these checks before replacing the cable — they confirm the cable is the right fix and not a nearby fault:
- Restore/format steps can erase data or indicate storage failure
- Treat ribbons, tabs, and ZIF connectors as fragile
- Use reset, Disk Mode, restore, or iTunes/Finder behavior as a software/storage check
- Reseat or inspect ribbon cable and connector seating
- Inspect ZIF latch, socket, or clamp condition
- Check drive noise, SMART/data signs, or storage recognition
Install Overview
Case difficulty
Very Difficult. 13 metal clips hold the case together. This is one of the toughest iPods to disassemble. Have extra plastic opening tools because they break.
Discharge before opening
Fully discharge the iPod before disassembly to reduce thermal event risk if the battery is accidentally punctured.
Rear-panel ribbons
Two ribbon cables connect the rear panel. Do not fully separate the halves until both are disconnected.
ZIF locking tabs
Both ends of the cable have ZIF connectors with flip-up locking tabs. Rotate 90 degrees straight up; never force sideways or the tab can snap.
Cable orientation
When reinstalling, confirm the cable contact side faces the correct direction. An upside-down cable is a documented cause of post-install Red X symptoms.
This guide covers iPod Classic hard-drive cable replacement steps. These steps are for thin 80GB / 120GB fitment, so verify the cable path before following them.
Disassembly Guide
Disassembly guide summary: iPod Classic Hard Drive Cable Replacement.
Show all 27 installation steps
This iPod case is unusually hard to open without damaging major components. Its metal faceplate, metal backing, and thirteen metal clips make disassembly especially demanding. Caution: this opening method can significantly damage the iPod beyond its current condition. Keep a few extra plastic opening tools nearby, since they are easy to ruin while opening the case. Confirm that the hold switch is locked before you open the iPod.
Opening this iPod is challenging, so do not get discouraged if it takes a few tries. Watch the plastic opening tool tip angle as you insert it into the iPod; keep it as vertical as possible while still clearing the rear panel edge. Guide a plastic opening tool into the seam between the front and rear of the iPod.
Slide a second plastic opening tool into the seam between the iPod front and rear, keeping the two tools at least 1.5 inches apart.
Working at an angle, carefully slide a putty knife about 1/8 inch into the gap between the two opening tools. You will find thin metal rails running along the inside of the back panel, so work very carefully when inserting the putty knife. After the putty knife clears the rear panel lip, rotate it vertical and carefully but firmly work it straight down through the opening tool gap.
Press on the rear panel behind the putty knife with your fingers to reduce bending. Slowly flex the putty knife so most metal tabs along this side of the iPod release. The idea is to control how the rear panel bends instead of trying to prevent all bending. Any side bend should draw the rear panel lip away from the iPod, not push outward on the curved surface. This also releases as many side clips as possible.
Take the putty knife out, then place it closer to the iPod corner and use the same gentle wiggle method. If possible, do not bend the rear panel corner.
Near the headphone jack, guide a plastic opening tool into the seam between the front and rear of the iPod. It may be easier to flex the putty knife downward carefully to create more room for the opening tool. Be careful not to bend the rear panel corner.
Near the display center, carefully slide a metal spudger into the gap made by the plastic opening tool. A visible bump can form here in the rear panel and is hard to repair. When levering the tab free, pivot the metal spudger on the rear panel edge instead of bending the rear panel outward. With the metal spudger, release the single clip at the iPod top edge.
Near the other top corner, guide a plastic opening tool into the seam between the front and rear of the iPod
On the other side, use the opening tool to start the same case-opening gap. It may help to angle the tool stuck in the top corner to create enough room.
Take the opening tool out of the top corner, then slide it into the seam between the iPod front and rear. Keep at least 1.5 inches between the two tools, as on the opposite side.
Working at an angle, carefully slide a putty knife about 1/8 inch into the gap between the two opening tools. Again, you will find thin metal rails running along the inside of the back panel, so work very carefully when inserting the putty knife. After the putty knife passes the rear panel lip, turn it vertical and carefully but firmly work it straight down through the gap between the plastic opening tools. Press on the rear panel behind the putty knife with your fingers to reduce bending. Flex the putty knife just enough to make sure most metal tabs along this side of the iPod release.
The metal clips near the corners grip the front panel tightly. Release these clips before opening the iPod. Carefully slide a metal spudger into the area beside the stubborn metal clip.
Gently work the metal spudger downward until it is fully seated in the rear panel.
Gently start releasing the clip from the front panel. A visible bump can form here in the rear panel and is hard to repair. When levering the tab free, pivot the metal spudger on the rear panel edge instead of bending the rear panel outward.
Use the metal spudger to apply upward pressure under the front panel until the metal clip releases.
You will find two ribbon cables connecting the rear panel to the remaining iPod assembly. In the following step, take care not to damage these ribbon cables. In this step, grasp the front-panel assembly with one hand and the back panel with the other. Pause for a moment before continuing. Very gently release the remaining rear-panel clips by pulling the tops of the front and rear panels apart, using the iPod bottom as a hinge. Take great care not to damage the ribbon cables joining the two halves.
With a spudger, slide the connector upward where it holds the orange battery ribbon. Lift the locking bar only about 2 mm to release the cable. Move the orange battery ribbon out of its connector.
Set the rear panel beside the iPod, taking care not to strain the orange headphone jack cable.
Raise the hard drive with one hand to expose the headphone jack ribbon underneath. With a spudger, flip up the plastic tab securing the headphone jack ribbon in place. The tab can rotate up 90 degrees, releasing the ribbon cable. Move the orange headphone jack ribbon out of its connector. The rear panel is now released from the iPod.
After opening, check the lower-case clips. If any clip bent upward, press it back down gently so the rear case can close cleanly.
Use the broad, flat face of the metal spudger to press the clip downward. Work carefully so the thin metal rail does not tear away from the rear panel. While shaping these clips, take care not to damage any headphone jack parts.
Set the rear panel on its side on a clean, hard surface. Carefully but firmly press it downward, rolling the full lip edge back into place. You may need to repeat this several times to straighten the sides well. Slightly overcorrecting the case edges inward is better than leaving them too far out, because reseating the front panel will bend the rear panel back into alignment. Once the rear panel is restored to good condition, continue with the iPod repair.
Rotate the hard drive out of the framework, then set it with the connector facing upward. With a spudger, lift the small black locking tab for the orange hard drive ribbon. The tab rotates upward 90 degrees and frees the ribbon cable.
Move the orange hard drive ribbon cable straight out of its connector. If the replacement hard drive did not include rubber mounting brackets or foam padding, transfer those parts from the old drive.
With a spudger, flip up the plastic tab securing the orange hard drive ribbon in place. The tab can rotate up 90 degrees, releasing the ribbon cable. Confirm that you are freeing the tab closest to the hard drive ribbon, not the connector's black section.
Move the orange hard drive ribbon cable straight out of its connector. If adhesive holds the cable to the logic board, carefully pull up on the cable to loosen it.
Product-specific placement, reassembly, and check
- Prepare and access. Confirm the exact model and listing fit first. Use the existing steps as a disassembly guide, gather the specified tools, disconnect power where applicable, and keep screws and cable positions organized.
- Place Hard Drive Cable (Thin — 80GB / 120GB). Seat the exact storage part, cable, or adapter in the original storage path and match its orientation, case depth, and supported configuration.
- Reassemble without force. Reverse only the access steps needed for this repair, keep cables clear of case edges and screw posts, and close clips in stages.
- Validate before final closure. Before final closure, verify detection, Disk Mode or restore behavior as applicable, and stable startup without repeat clicking or a loose connection.
Stop condition: Stop if a connector, latch, screw, clip, housing edge, or the replacement part resists normal alignment. Recheck model fit, orientation, cable routing, and trapped hardware instead of forcing it.
After This Repair
| Check | What to do |
|---|---|
| Test the connected part | Confirm the assembly on both ends of the cable behaves normally before closing the iPod. |
| Still not working? | Inspect the latch, cable orientation, and board-side connector before replacing another part. |
Troubleshooting
Quick Diagnosis
Buy this when
- The iPod is MB029LL/A, MB147LL/A, MB562LL/A, or MB565LL/A with the 10.5 mm / 0.41 in thin rear case.
- The flex is torn, creased at the fold line, corroded, the ZIF latch is damaged, or the storage symptom persists after reseating with confirmed contact.
Check first when
- Red X icon: Apple treats this as a drive-failure warning first. Treat the cable as the secondary suspect, especially after a drop, visible cable damage, or a symptom that changes after reseating.
Do not buy for
- 2007 160GB thick MB145LL/A or MB150LL/A models that keep the original CE-ATA drive; those need the
821-0546thick cable. A flash conversion in that thick shell uses this thin ribbon instead. - Dock connector, 30-pin connector, battery connector, headphone jack, or power-only repairs.
Other Symptoms That May Involve This Part
| Symptom | What it means & what to check |
|---|---|
| flash adapter not recognized | Check cable seating, ZIF locks, storage format, and USB behavior before treating the cable as failed. |
| stuck in recovery mode, apple.com/support, Flash Mod Problems, Wont turn on after repair, recovery mode stuck, storage trouble, 80GB hard drive in a 160GB iPod Classic, logic board failed and need data off the hard drive | Treat this as a storage-path clue, then compare cable condition, drive behavior, and fitment. |
| click noise, click sound, Clicking Noise, clicking sound | A drive can make the same sound, so reseat the cable and compare against known-good storage before buying the ribbon. |
| drive already corrupted, drive dead, drive was corrupted, hard drive dead, hdd connector | Drive-health language is not proof of a bad cable. Inspect the cable ends, fold line, and ZIF locks while also checking the drive or adapter itself. |
| error 1416, error 1429, error 1439, error code, error message, iTunes Error, Reboot Loop, iPod Classic 80GB Error 1303 | Restore and iTunes errors can involve the storage path; reseat the cable, confirm adapter or drive format, and test known-good storage before replacing the ribbon. |
| Sad iPod Icon, showing a folder, red X after hard drive replacement | Reseat both ZIF ends and inspect the fold line; the cable is stronger evidence when the icon appears immediately after the Apple logo. |
| Stuck on Apple Logo | Apple-logo hangs can come from storage not initializing; check the cable and storage device together before buying either part. |
Failure Signs / When This Cable Helps
Use storage behavior as a check, not proof. The cable is most plausible when thin-case fitment is confirmed and the symptom changes after reseating, fold-line inspection, or known-good storage checks.
| Symptom | What it means & what to check |
|---|---|
| Symptom remains after basic checks |
What you may see: The iPod still points back to Hard Drive Cable (Thin — 80GB / 120GB) after cable seating, battery stability, and nearby connector checks. Check first: Retest with known-good cables or adjacent parts where practical before ordering. Check next: A nearby cable, connector, battery, storage device, display path, audio path, or board path can mimic a bad cable. |
| Symptom changes when touched or reseated |
What you may see: The symptom changes after moving the part, reseating a cable, or applying light pressure near the connector path. Check first: Inspect the connector, latch, flex, solder joints, and nearby board area for damage or corrosion. Check next: This can still be a connection issue rather than a failed cable alone. |
| Red X, red circle, sad iPod, or folder icon |
Check First: Treat the drive as the first suspect, then reseat the cable and inspect both ZIF ends for lifted locks, corrosion, torn flex, or poor contact. Cable Signal: Stronger when the symbol appears immediately after the Apple logo, after a drop, or after the cable fold line was disturbed. |
| Folder icon immediately after the Apple logo |
Check First: Reseat the logic-board and drive-side ZIF ends before ordering parts. Cable Signal: Stronger cable signal than a delayed folder after clicking or grinding. |
| Clicking, click of death, or grinding before the folder appears |
Check First: Test or swap the drive before blaming the cable. Cable Signal: The click of death can be the drive or the cable; if reseating the cable stops the clicking, the cable was the issue. |
| Won't restore, corrupted data, restore loop, or stuck in disk mode |
Check First: Check drive health, formatting, flash adapter seating, SD card format, and the board-side storage connector. Cable Signal: Stronger when reseating or replacing the thin cable changes restore behavior. |
| Storage stopped working after a flash adapter install |
Check First: Confirm cable orientation, contact side, ZIF tabs, card format, and the 128GB usable limit on 6G logic boards. Cable Signal: Stronger when reversing orientation or reseating the cable changes recognition. |
| ZIF lock or fold-line damage |
Check First: Inspect the flip-up locking bars and the crease where the flex bends around the drive. Cable Signal: Strong cable signal when the lock will not clamp, the flex is torn, or reseating temporarily fixes the issue. |
| Related checks |
|
Do Not Buy This Cable Yet If...
| Situation | Start here instead |
|---|---|
| Your iPod is a 2007 160GB thick model (MB145LL/A or MB150LL/A, 13.5 mm case) and still has its original CE-ATA drive | You need the thick hard-drive cable marked 821-0546; this thin ZIF cable does not fit that drive. A flash conversion in that same thick shell uses this thin ZIF ribbon instead. |
| You're not sure if your iPod is thin or thick | Measure case depth: 10.5 mm = thin, which is this listing. 13.5 mm = thick, which uses a different cable. Or match your order number in the fitment table. After a storage conversion, identify the installed storage instead: thin ZIF drives and flash adapters use this thin ribbon; only the original thick CE-ATA drive uses 821-0546. |
| The iPod shows a red X, sad iPod, or folder icon but you haven't tried reseating the cable | Reseat the existing cable first because that check is quick. Buy only when the cable is torn, creased, corroded, or the symptom persists after reseating with confirmed contact. |
The removed cable is marked 821-0546 or 821-0546-A
|
That marking points to the thick CE-ATA cable path, not this thin 80GB / 120GB ZIF route. |
The removed cable is marked 632-0340 or 821-0387-03
|
That is the Hitachi-drive thin cable. This listing ships the Toshiba-drive thin cable (632-0337 / 821-0386-03 / 821-0728-01), the cable in most thin-case Classics — contact us before ordering and tell us the marking you read. |
| The symptom appeared after a storage swap or flash adapter install | Recheck cable seating, adapter orientation, formatting, and battery stability before ordering another cable. |
| You need the 30-pin dock connector, battery connector, or headphone jack cable | This is the internal hard-drive ribbon. It is not for dock, USB, battery, or headphone assemblies. |
What Owners Report
Anecdotal owner reports (not a guarantee or authoritative proof): these are owner reports, not guarantees or authoritative proof that a particular part will fix a symptom. Use them as a troubleshooting starting point: confirm the symptom, run the quick checks, then match the fix.
Shuts off the moment external power drops? That is the power path, not the storage — run the battery page's charging checks before buying a drive or cable.
Sad face, red X, or clicking drive
Symptoms. Red X in a circle pointing to Apple's support page; sad-face icon; rhythmic clicking or a click-then-clunk from inside; freezes partway through loading music; drive reports full with nothing on it; won't enter Disk Mode.
Usually the drive — a torn or half-seated ribbon cable mimics it. Grinding or odd noise, a long or five-minute Apple-logo hang, and files corrupted during copying can indicate trouble in the storage path; copy needed data first and test the drive and cable.
Check first. Diagnostics: read the drive test. Disk Mode: if the computer sees it, copy files off before any format, zero-write erase or restore. Bench-test on an adapter matched to the drive (ZIF thin; CE-ATA for the thick 160GB's factory drive).
Fix. Replace drive and ribbon cable together; a red X after a fresh drive is normal until the restore. Reported by 35 owners.
Which drives fit: sizes, cables, thick vs thin hardware
Symptoms. Broken drive and shopping for a replacement; new drive too thick for the case; wondering whether a bigger drive works; drive from another iPod model on hand.
- Thin 80GB and 120GB: a 5 mm drive on the ZIF connector and thin ribbon. 2007 thick 160GB: an 8 mm CE-ATA drive with its own 821-0546 cable; the two never mix. The later thin Classic is a different platform with its own drives, cables and storage rules — see its own pages.
- Fit: like-for-like with the matching cable, per the drive/cable combinations in the fitment table — sliding in is not proof of fit. SATA never fits: the 240GB and 320GB laptop drives sold at similar prices use a different connector, and no adapter makes them native.
- On stock Apple firmware any replacement shows up to about 128GB usable; a thick drive in a thin case also needs the thick rear panel, cable, bumpers and jack.
Confirm thick vs thin first: 10.5 mm case depth is thin, 13.5 mm thick. Reported by 11 owners.
Red X persists after a drive replacement
Symptoms. New drive installed, still the red X; can reach diagnostic mode but not Disk Mode; replaced drive AND cable and it's still there; iTunes error codes during the first restore.
- A red X right after a blank drive goes in is expected — no software yet: Disk Mode (reset, then Center + Play/Pause), connect, restore; judge only after a completed restore.
- Restore cannot complete: bench-test the new drive on an adapter matched to its interface (ZIF thin; CE-ATA for the thick 160GB's factory drive) — a replacement can itself be faulty; exchange it.
- Inspect the ribbon under magnification; confirm the right cable for the drive (thick-160 is not the thin cable) and a seated clip.
- Only after power, cable and a completed restore check out is the board's drive interface the remaining suspect.
Fix. Replace cable and drive as a pair. Reported by 11 owners.
Problems after battery replacement
Symptoms. Won't boot at all with the new battery in; turned on once then died; charges to half and stops; "Charging, please wait" persists after replacement; laptop powers the iPod but no longer recognizes it.
Check first.
- Original battery back in: alive on it but dead on the new one = a bad replacement — exchange it.
- Cable fully in, straight, clasp locked; lift the clip with an L-bent paperclip pulled gently straight up — prying rips the connector off.
- Connector still on the board? A loose one reads like a dead battery.
- First charge on a wall adapter; allow 15–30 minutes.
Fixes. Bad cell → exchange it. Torn connector → solder-level repair or a logic board. Drive swapped just before the trouble? Re-check its ribbon too.
Caution. Judge a new battery after a full charge-drain cycle, not the first hour.
Community signal. Reported by 9 owners.
Restore failures, errors, and Disk Mode fights
Symptoms. Restore starts then errors out; partial sync (a few GB) then failure with the library vanishing; stuck in Disk Mode with iTunes blind to it; capacity reads 127GB no matter the label; diagnostics halt at a FireWire test.
- Partial syncs dying at the same point suggest bad sectors: copy off what you need, then bench-test it on an interface-matched adapter.
- Stuck in Disk Mode: Menu + Center exits.
- A 127–128GB reading on a bigger drive is this model's stock-firmware limit, not a defect; reformatting won't change it. The later thin Classic is a different platform with its own drives, cables and storage rules — see its own pages.
- The built-in FireWire test needs a FireWire source connected; without one it stalls — skip it and read the drive tests.
Then restore from Disk Mode; replace drive and cable together if sick. Reported by 8 owners.
Corrupt filesystem after storage work
Symptoms. "0 KB free" after a sync; sad face after installing a new drive; refuses Disk Mode; iTunes claims files are in use by another application; error numbers during restore; noisy drive that freezes.
- Reset, connect to a rear USB port (never a hub or keyboard port), copy off anything you need, then let the restore run.
- New drive: confirm the cable seat, then restore; the sad face persists only if drive, cable or restore path is bad.
- "Files in use" loops: Disk Mode (reset, then Center + Play/Pause), copy first, then a plain format from the computer and a restore.
Usually: if errors persist across a known-good computer, cable and power source, look at the drive and its connection rather than reformatting again — a noisy drive that freezes during the restore is very likely failing. Replace drive and cable together. Reported by 6 owners.
Flash and SSD conversions: what actually works
Symptoms. Dead drive and deciding between another mechanical drive and flash; SSD upgrade that worked then quit; SSD reads half its size after a board swap; which cards/adapters to trust.
An SD/microSD adapter on the thin ZIF ribbon is the mainstream route. A flash build in the thick 160GB uses the thin ZIF ribbon (sold separately); the 821-0546 CE-ATA cable only fits the original drive.
On stock Apple firmware this model uses up to about 128GB of any flash build; a bigger card's excess is unavailable — also why an SSD "shrinks" after a board swap: on an older board a 256GB SSD still reports about 128GB, so match the board generation to the build. The later thin Classic is a different platform with its own drives, cables and storage rules — see its own pages.
Caution. Counterfeit cards are the top conversion killer — a card sold as 128GB that is secretly 8–32GB restores fine, then corrupts as the library grows; run a full-card write test. Reported by 5 owners.
Bigger storage: upgrades, flash conversions, and the 128GB line
Symptoms. 80GB unit full and eyeing 160GB+; found a big 240GB drive online — will it work?; planning an 80→160 conversion with thick parts; wondering why the 2007 model shipped with 160GB if the platform "caps at 128".
- On stock Apple firmware, replacement storage in this model tops out at about 128GB. The factory 2007 thick 160GB is the exception: its drive uses a CE-ATA interface and addresses its original full capacity, and so does a like-for-like CE-ATA replacement; a ZIF drive or a flash adapter in any Classic of this generation meets the ~128GB stock-firmware ceiling instead. The later thin Classic is a different platform with its own drives, cables and storage rules — see its own pages.
- A bigger thin drive (confirmed drive/cable combination) nets the cap; a thick conversion (thick rear panel, cable, bumpers, battery, jack) restores parts, not capacity; flash is the same disassembly, no moving parts.
Listings rarely mention this limit. Reported by 5 owners.
General battery diagnosis and testing
Symptoms. Battery drains abnormally fast (especially after getting wet); "low battery" appears minutes after a full charge; wanting to bench-test the board or battery before buying parts.
Check first.
- After liquid exposure, disconnect power and inspect for corrosion before charging or testing with a known-good battery.
- The reviewed sources supplied no board schematic; component substitution can help isolate the fault.
Fixes. Replace the battery to set a known-good baseline — cheapest part, commonest fault. Lift the connector's clip gently straight up (an L-bent paperclip works); prying rips it off. Match the number printed on the old cell — thin and thick differ.
Caution. Higher-capacity cells charge more slowly and the readout drifts; judge run time over a full cycle.
Community signal. Reported by 4 owners.
Computer/iTunes can't see it — drive-side causes
Symptoms. iTunes and the file explorer freeze the moment it's connected; resets fine and shows the Apple logo but never appears on the computer; restore prepares then the iPod drops off; CRC (redundancy-check) errors during transfer.
- A host freezing on connect often means sick sectors, but a damaged ribbon looks the same: run diagnostics and read the drive tests. Diagnostics: reset, then hold Previous + Center as the logo appears. The built-in FireWire test needs a FireWire source connected; without one it stalls — skip it and read the drive tests.
- CRC errors: a copy failed its integrity check — drive or ribbon; back up, then bench-test it on an interface-matched adapter.
- A replacement reading smaller than its label has met this model's stock-firmware limit; reformatting won't change it.
Replace drive and cable once tests confirm; if it mounts clean externally, check the battery side. Reported by 4 owners.
Slow access, clicking on library load, drive transplants
Symptoms. Click-click while browsing or uploading, everything takes forever; wondering if the drive can move into a 5th-gen Video body; saltwater casualty with photos aboard.
- Slow plus clicking is the drive struggling: copy your media off now and plan the replacement (drive and cable together).
- Transplants. The thick 160GB's drive never fits a Video; the 120GB drive is reported not to work there; the 80GB drive has mixed reports (it needs the Video's own ribbon, and some units still refuse) — check the drive model, not the iPod.
- Saltwater. Disconnect power at once and do not switch it on; open it, assess the corrosion, and recover the files through an adapter matched to the drive (see the recovery question) — salt finishes drives quickly.
Community signal. Reported by 4 owners.
Flash conversion misbehaving: recovery loops and phantom corruption
Symptoms. Goes into recovery mode every time it's unplugged; diagnostics can't detect the storage after a drop; freshly converted unit reports corruption again.
- Recovery mode on unplug: try a different, known-genuine card. If it behaves, the original is fake or failing; if nothing behaves, reseat the adapter, then the ribbon cable.
- Storage undetected on a computer: a volume with no drive letter never shows in the file explorer even when the hardware is fine.
- Corruption on a fresh build: run a full-card write test, confirm the restore finished, and keep the library within the usable stock-firmware capacity (about 128GB here) — a bigger card's excess is unavailable, not corrupting.
Fix. A genuine card and a seated adapter settle most of it; what remains is usually the ribbon cable.
Community signal. Reported by 3 owners.
Random pause when bumped
Symptoms. Music pauses (or the unit stumbles) the moment it's bumped or hits anything in a pocket, then resumes.
What it usually is. Owners report the drive or its ribbon cable losing contact for a moment, or a drive shifting because a bumper is missing — the bumpers are the shock isolation. A headphone-jack detection fault can pause playback on a knock too, so this check does not rule that out.
Check first. Open it, reseat the ribbon cable and inspect it for tears, and confirm both drive bumpers are present and seated. If that does not cure it, treat it as early drive failure: copy your files off, read the SMART counts in diagnostics, then replace drive and cable together. For which drives and cables fit, see the fitment card.
Community signal. Reported by 3 owners.
Worth Knowing
- This listing ships the Toshiba-drive thin cable (632-0337 / 821-0386-03 / 821-0728-01), the cable fitted to most thin-case Classics. Confirm the marking on the cable you remove before ordering: if it reads 632-0340 or 821-0387-03 it is the Hitachi-drive cable — contact us before ordering.
- The thick 160GB CE-ATA cable uses a different CE-ATA path and is not compatible with this thin 80GB / 120GB route.
- For flash adapter installs on 6G logic boards, the ZIF cable path is the same, but usable SD-card storage is limited by the 6G stock-firmware storage limit.
- Physical drive repair (opening the drive casing) is not feasible outside a clean room; mechanical damage keeps escalating — a failing drive is replaced, not repaired.
Questions
Frequently Asked Questions
How do I tell if I need the thin or thick hard drive cable?
Measure case depth: 10.5 mm (0.41 inch) is thin, which is this listing. 13.5 mm (0.53 inch) is thick and uses the 821-0546 cable. Or match your order number: MB029LL/A and MB147LL/A are 80GB thin; MB562LL/A and MB565LL/A are 120GB thin; MB145LL/A and MB150LL/A are 160GB thick. Match the installed storage first: original thin 80GB/120GB drives and flash conversions in any of these shells use the thin ZIF ribbon; only the original thick 160GB CE-ATA drive uses 821-0546, so case depth alone is not enough after a conversion. Apple's figures are about 162 g for the thick 160GB and 140 g for the thin 80GB and 120GB; on a unit with a swapped back or new drive, trust the case depth: 10.5 mm thin, 13.5 mm thick. Refurbished units often wear swapped backplates, so trust the internals — the drive class and the code printed on the battery — over the engraving or the seller's title.
What generation is model A1238?
Every Classic says A1238 on the back, so the model number alone cannot tell you which one you have — owners who bought the wrong part once usually matched A1238 and nothing else. Capacity narrows it: 80GB and 120GB are always thin; a 160GB is either the 2007 thick model or a later thin one. Apple's serial lookup names the release (a plain "iPod classic" is a 2007 unit), but a serial describes the unit as it left the factory. Apple's figures are about 162 g for the thick 160GB and 140 g for the thin 80GB and 120GB; on a unit with a swapped back or new drive, trust the case depth: 10.5 mm thin, 13.5 mm thick. Across the thin 80GB and 120GB, rear panels, batteries, drives, cables and headphone jacks interchange; the 2007 thick 160GB keeps its own rear panel, battery, drive, cable, bumpers and headphone jack. Faceplates, click wheels and the standard screen fit every Classic. A1238 identifies the Classic family; for the Video model, see its own pages. If the iPod froze on an unfamiliar computer's sync screen, slide Hold off and on, then hold Menu + Center until the Apple logo appears — that is the whole fix in most cases; if the library is unusable afterwards, see the Restore & sync questions on the hard-drive pages.
Does this fit a Late 2008 6.5G or 7th Gen iPod Classic?
Yes for the 120GB MB562LL/A and MB565LL/A models. Sellers and owners sometimes call those Late 2008, 6.5G, or 7th Gen, but their cable path is the same thin ZIF route as the 80GB models. The later thin Classic is a different platform with its own drives, cables and storage rules — see its own pages.
Why does my iPod show a Red X in a circle?
A red X calls for storage-path checks; the symbol alone does not identify a failed drive, cable or logic board. For the thin mechanical-drive or supported flash route, inspect the matching ZIF ribbon, its seating and the installed storage. Check power stability and whether the computer recognizes the iPod before considering a replacement. Preserve needed files before any Restore, which erases the iPod. A known-good cable connection alone does not prove the drive failed.
Can I replace the hard drive with an SSD or flash adapter?
Yes. flash-storage adapters use the same ZIF cable path as the original drive. This thin cable works for HDD and flash-adapter installs on 80GB / 120GB models. A flash build in the thick 160GB uses the thin ZIF ribbon (sold separately); the 821-0546 CE-ATA cable only fits the original drive. Stock Apple firmware limits usable flash storage to about 128GB with SD cards.
How do I tell if it's the cable or the drive?
If the iPod goes from the Apple logo to a folder icon almost immediately, the cable is the more likely suspect. If the iPod hangs on the Apple logo for several seconds before showing the folder, or makes clicking or grinding sounds, the drive itself is more likely failing.
My iPod won't recognize the flash-storage adapter. Is it the cable?
Cable seating is one of the first checks for flash adapter recognition failures. Check that the cable is fully seated at both ends, the ZIF locking tabs are engaged, and the cable contact side faces the correct direction. An upside-down cable can cause a Red X.
Will restoring my iPod erase everything?
Yes. Restoring through iTunes or Finder (on Windows: iTunes for Windows, or the newer Apple Devices app) erases all content. Copy off anything that exists only on the iPod before using restore as a check — see the recovery question below.
What if my iPod is stuck on Do Not Disconnect?
Do Not Disconnect normally appears during sync. If do not disconnect stays frozen after restart, check cable seating because this cable connects storage to the logic board.
What if it is stuck on OK to Disconnect?
OK to Disconnect usually resolves on its own after eject. If ok to disconnect is frozen, force restart with Menu + Select before ordering a cable.
How do I get my music off a dead or dying iPod?
Owners describe it as: the drive is shot and the music isn't anywhere else; the board died but the drive is fine; a customer or family unit with irreplaceable files; photos and music trapped on the iPod; no access to the old iTunes account; a sync would wipe it.
If it still boots at all: Disk Mode first — reset (Menu + Center), then hold Center + Play/Pause. The computer mounts it like a drive with no account sign-in involved; copy everything off before any sync or restore, because a sync can replace the content and a restore erases it. Media sits renamed in hidden folders: transfer utilities reassemble titles and playlists, or copy the raw folders and re-tag later.
Board dead, drive alive: mount the bare drive on an adapter that matches its interface (ZIF for the thin 80GB and 120GB drives; the thick 160GB's factory drive is CE-ATA) and copy directly. Windows normally cannot read a Mac-formatted iPod without extra software; a Mac can read a Windows-formatted one — try the other computer before declaring it unreadable.
Clicking drive: every power-on costs data, so make one short copy attempt first; sector-recovery software sometimes gets a full pass, and clean-room recovery beyond that is a specialist service. Nothing here guarantees photo originals or complete playlists. The old sync computer usually still holds everything the iPod ever synced. Reported by 6 owners, plus one lost-account case.
You May Also Want
flash-storage adapters use the same thin ZIF cable path; stock Apple firmware limits usable flash storage to about 128GB.
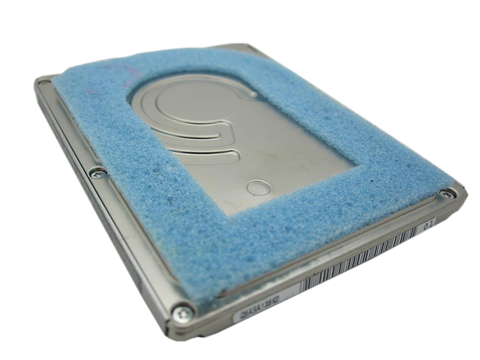
Related: Hard drive options (80GB / 120GB thin)Choose the drive capacity that matches your thin iPod before ordering.
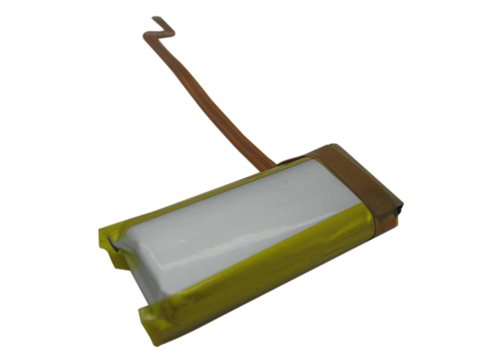
Related: Replacement Battery (Thin — 80GB / 120GB)The thin battery is checked during storage service during opening; inspect it while the case is open, especially if runtime is weak or the cell is swollen.
Search terms
Why people land on this part
Also searched as: iPod classic 6th Generation Hard Drive Cable, Hard Drive Failure, restore error, hard drive connector cable ribbon, A1238 hard drive cable, iPod 6g Classic 80GB, iPod Classic 6th Generation thin models, external drive, 160GB HDD, hard reset, tried charging, Hard Drive Cable (Thin — 80GB / 120GB) replacement, Red X Icon, Clicking Noise, Sad iPod Icon, Folder Icon, Corrupted Data, Stuck in Recovery Mode, iTunes Error, Reboot Loop, Stuck on Apple Logo, Won't Restore, Stuck in Disk Mode, Flash Mod Problems, hard drive dead, clicking sound, showing a folder, hdd connector, hard disk, battery connector, drive already corrupted, drive was corrupted, drive flex cable, solid state drive, error 1416, error 1429, click noise, click sound, click of death, iPod Classic 80GB Error 1303, ok to disconnect, red circle, Sad iPod, storage trouble.
Some buyers search for "ZIF hard drive cable", "hard drive connector cable", "hard drive flex ribbon cable", "ZIF 40-pin", "broken", "solid state drive", "hard disk", "hard drives", or "Cable installed upside-down causes red X"; confirm the checks above point to this same part before ordering.
Questions people ask
- Does this fit a Late 2008 6.5G or 7th Gen iPod Classic.
- My iPod won't recognize the flash-storage adapter — is it the cable.
- folder icon right after the Apple logo — cable or drive
Free diagnostic
Broken iPod? We can help.
Mail us your iPod and we will test it and send you a free repair quote. If you don't like our price, we will ship your iPod back at our expense.