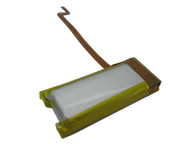
Replacement battery for thin-case iPod Classic 6th Generation 80GB and 120GB models. Use this listing for MB029LL/A, MB147LL/A, MB562LL/A, or MB565LL/A after confirming order number, rear-case depth, and basic dock or storage checks.
Product Overview
This is the iPod Classic 6th generation battery replacement route for thin 80GB and 120GB Classic models: MB029LL/A, MB147LL/A, MB562LL/A, and MB565LL/A. iPod Classic battery replacement varies by generation and case thickness, and this listing is for the thin 6th generation battery only.
Replacement capacity varies by supplier; many thin-form listings fall around 580-850 mAh, but Apple did not publish original capacity for this pack.
Use this listing for weak runtime, a battery that won't charge, an iPod that won't turn on after a long known-good charge attempt, a Charging, please wait loop, or a swollen thin-case battery. If the main symptom is sync trouble, clicking storage, sad iPod, liquid damage, or a post-repair connector problem, check these before ordering.
- LTC4066 IC = USB power manager and Li-Ion battery charger
- Apple logo stuck may be caused by macOS HFS+ format incompatibility
- Clean logic board with 90%+ isopropyl alcohol
- Clean logic board with rubbing alcohol and soft paintbrush
- LTC4066 monitors battery charge state and temperature
- Initialize disk format: HFS Plus (Mac) or FAT32 (Windows)
Choose Your Option
This part comes in multiple variants. Confirm your iPod's capacity, case depth, and order number before ordering.
Choose this for 80GB / 120GB thin-case Classics with the 10.5 mm rear case and 616-0229 battery path.
You're viewing this optionUse this linked battery option only for 160GB thick-case iPods and the order numbers shown here.
View this option → 3000mAh / Custom Thin New Custom Thin 3000mAh BatteryUse this linked battery option only for 3000mAh custom thin-case iPods and the order numbers shown here.
View this option →What Is Included
Quick Diagnosis
Buy this when
- The iPod is MB029LL/A, MB147LL/A, MB562LL/A, or MB565LL/A with an 80GB or 120GB drive and the 10.5 mm / 0.41 in thin rear case.
- Runtime is very short, the iPod only works when plugged in, the battery is swollen, or it still shows low-battery behavior after a long known-good charge attempt.
Check first when
- The iPod has been stored uncharged; leave it on a known-good charger for 30+ minutes before treating silence as proof of a bad battery.
- The symptom happens only during sync or computer connection; check the 30-pin dock connector, USB cable, and USB port first.
Do not buy for
- 2007 160GB thick-case models; those use the thick battery path with
616-0232. - Dropped, liquid-damaged, corroded, or post-repair no-power iPods until the board, connector seating, and ribbons are inspected.
- This thin battery route covers iPod Classic 6th Generation 80GB / 120GB models with the 10.5 mm rear case. 2007 160GB thick models use 616-0232, and Late 2009 160GB thin models must be verified separately.
- Do not use this part for: 2007 160GB thick models (MB145LL/A, MB150LL/A) - use thick battery 616-0232.
- Do not use this part for: Late 2009 160GB thin models (MC293LL/A, MC297LL/A) - not covered by this 80GB / 120GB listing; verify the separate Late 2009 / 7G thin 160GB route before ordering.
- Do not use this part for: Battery marked 616-0232 - wrong thick-pack part for this thin 80GB / 120GB route.
- Confirm the capacity match before ordering: 120GB, 80GB.
- Confirm the case thickness before ordering: thin.
- Apple did not publish original capacity for the thin 80GB / 120GB 616-0229 battery route; replacement-cell capacity varies by supplier.
Specifications & Fitment
Part Details
| Detail | Value |
|---|---|
| Model Number | A1238 |
| EMC | EMC 2173 |
| Condition | New replacement battery |
| Battery Capacity | Apple did not publish original capacity |
| Device Storage | 80GB / 120GB |
| Chemistry | Li-Ion |
| Voltage (Nominal) | 3.7V |
| Charge Voltage | 4.2V |
| Connector | Brown latch battery ribbon |
| Soldering Required | No |
| OEM Part | 616-0229 |
Compatible Variants
| Order Number | Capacity | Color | Case | Compatible | Notes |
|---|---|---|---|---|---|
| MB147LL/A | 80GB | Black | thin (0.41 in) | Yes— stock match | — |
| MB029LL/A | 80GB | Silver | thin (0.41 in) | Yes— stock match | — |
| MB565LL/A | 120GB | Black | thin (0.41 in) | Yes— stock match | — |
| MB562LL/A | 120GB | Silver | thin (0.41 in) | Yes— stock match | — |
| MB150LL/A | 160GB | Black | thick (0.53 in) |
No— 2007 160GB thick models (MB145LL/A, MB150LL/A) - use thick battery 616-0232
|
2007 160GB thick models (MB145LL/A, MB150LL/A) - use thick battery 616-0232
|
| MB145LL/A | 160GB | Silver | thick (0.53 in) |
No— 2007 160GB thick models (MB145LL/A, MB150LL/A) - use thick battery 616-0232
|
2007 160GB thick models (MB145LL/A, MB150LL/A) - use thick battery 616-0232
|
| MC297LL/A | 160GB (Late 2009) | Black | thin |
No— 2007 160GB thick models (MB145LL/A, MB150LL/A) - use thick battery 616-0232
|
2007 160GB thick models (MB145LL/A, MB150LL/A) - use thick battery 616-0232
|
| MC293LL/A | 160GB (Late 2009) | Silver | thin |
No— 2007 160GB thick models (MB145LL/A, MB150LL/A) - use thick battery 616-0232
|
2007 160GB thick models (MB145LL/A, MB150LL/A) - use thick battery 616-0232
|
Failure Signs / When This Battery Helps
Use symptoms as a routing check, not proof. The thin battery is the right part only when 80GB / 120GB fitment is confirmed and the easier dock, storage, and connector checks do not explain the behavior better.
| Symptom | Check First | Battery Signal |
|---|---|---|
| Won't charge, not charging, or doesn't charge | Try a known-good USB cable, charger, and USB port; inspect the 30-pin dock connector for bent pins, debris, or corrosion. | Stronger when the iPod shows low-battery behavior with known-good power and the thin battery path is confirmed. |
| Won't turn on or battery drained | Leave a stored-dead iPod on known-good power for 30+ minutes, then reset with Hold off before opening. | Stronger when it wakes only on external power or shuts off quickly once unplugged. |
| Very Low Battery or Connect to Power screen | Charge from a known-good source long enough to separate deep discharge from a failed cell. | Stronger when very low battery or connect to power returns immediately after a full charge attempt. |
| Battery dies or only works when plugged in | Separate storage spin-up load from battery sag by listening for clicking and watching restore or disk-mode behavior. | Stronger when storage behavior is normal but runtime collapses. |
| Overheating during charging or use | Stop charging, let the iPod cool, and check charger, cable, dock connector, and swelling before reopening. | Aging or failing batteries can cause overheating, but charger and dock faults should be checked first. |
| Swollen or expanded battery | Stop charging; do not bend, compress, or puncture the cell. | Use this listing only after confirming the thin 80GB / 120GB case and recycling the old cell safely. |
| Charging, please wait loop | Give it a long known-good charge first, then inspect battery connector seating if the iPod was recently opened. | Battery remains likely when the loop persists and dock/storage checks are clean. |
Other Symptoms That May Involve This Part
| Commonly described as | What to check before ordering |
|---|---|
| battery won't charge | Check the USB cable, charger, dock connector, and storage spin-up load before ordering a replacement battery. |
| charging please wait, dead after battery | Charge from a known-good source long enough to separate deep discharge from a failed cell, then confirm the case-depth battery path. |
| shuts down randomly, battery drain, new battery, replaced battery, broken | Use this as a battery clue only after the iPod matches this listing's thin-case battery fitment. |
Related checks
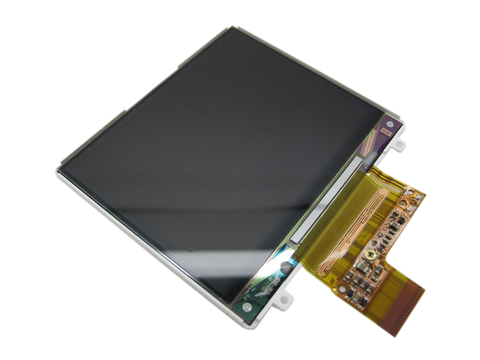
- Replacement Screen (LCD Display): check this part first when the nearby screen check matches the symptom better.
- 30-Pin Dock Connector / Charging Port: check this part first when the nearby dock connector check matches the symptom better.
Power, charging, or runtime symptoms
What you may see: People describe short runtime, charging trouble, sudden shutoff, or an iPod that will not reliably power on
Check first: Check the capacity engraved on the back case: 80GB or 120GB means thin, while 160GB means thick. Order parts matching that case thickness
- Test with a known-good charger and cable before opening the iPod
- Note whether the iPod shows charging, briefly powers on, shuts down under load, or never wakes at all
- If the symptom began after service, inspect the battery connector and nearby flex paths before replacing another part
Fitment or model-variant mismatch
What you may see: People ask whether a similar-looking part from another capacity, case thickness, or generation will work
Check first: Check the capacity engraved on the back case: 80GB or 120GB means thin, while 160GB means thick. Order parts matching that case thickness
- Match the exact model, generation, capacity, and case style shown for the product
- Do not use a symptom to override fitment: a wrong-variant part can create new symptoms after installation
Symptom remains after basic checks
What you may see: The iPod still points back to Replacement Battery (Thin — 80GB / 120GB) after cable seating, battery stability, and nearby connector checks.
Check first: Retest with known-good cables or adjacent parts where practical before ordering.
Check next: A nearby cable, connector, battery, storage device, display path, audio path, or board path can mimic a bad battery.
Repair considerations
Repair specialists who work on this model consistently flag these checks before replacing the battery — they help confirm the battery is the right fix and not a nearby fault:
- Let alcohol or liquid cleaning dry before power-up
- Swollen or damaged batteries require safety framing
- Try known-good cable, charger, USB port, or computer
- Replace battery
Do Not Buy This Battery Yet If...
| Situation | Start here instead |
|---|---|
| 2007 160GB thick-case Classic, MB145LL/A or MB150LL/A | Use the thick battery path with 616-0232. |
| Late 2009 160GB MC293LL/A or MC297LL/A | Verify the separate Late 2009 / 7G thin 160GB battery path before ordering. |
| Sad iPod, folder icon, clicking drive, red X, or restore errors | Check the hard drive, hard-drive cable, flash adapter, and formatting before the battery. |
| Boot loop or repeated restart | Charge for an hour and try restore before ordering. A boot loop can be battery sag, firmware, or storage. |
| Charges but will not sync, or syncs but will not charge reliably | Check the 30-pin dock connector, USB cable, and USB port first. |
| Worked before repair and now will not turn on | Check battery connector seating, latch position, and nearby ribbons before buying another battery. |
| Visible liquid damage or corrosion | Have the board inspected and cleaned before using a battery swap as the test. |
- Try different USB port and wall charger before hardware diagnosis
- Check dock connector for damaged pins
- Clean logic board with isopropyl alcohol; check connector for debris
- LTC4066 location: bottom left of logic board, opposite battery connector
- Check battery voltage with voltmeter as first diagnostic step
- Dock connector pinout [sourcing reference removed].ru for multimeter testing
Install Overview
Discharge before opening
Fully discharge the iPod before disassembly. This reduces the risk of a thermal event if the battery is accidentally punctured.
Case opening difficulty
The thin metal case uses tight clips and scratches easily at the seam. Start with thin plastic opening tools; avoid using bare metal as the first pry tool.
Brown battery connector latch
The brown latch is fragile. Lift it straight up about 1 mm with angled tweezers or a plastic tool; do not push sideways or pry on the white connector edge.
Ribbons under the battery
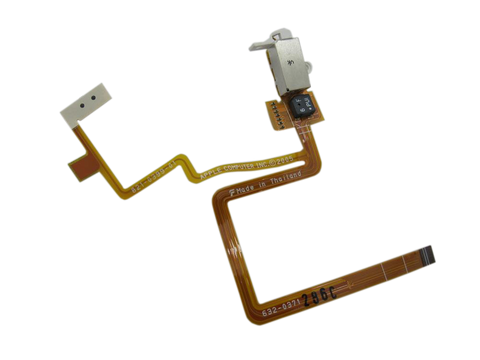
Headphone jack and Hold button ribbon cables run under the battery area. Disconnect and free the rear-panel ribbons before lifting the battery aggressively.
Swollen battery safety
Do not puncture, bend, or compress a swollen lithium battery. Stop charging and recycle the old cell through an appropriate battery or e-waste drop-off.
Repair Guide
Repair guide summary: iPod Classic Battery Replacement.
Show all 24 installation steps
For safety, completely discharge the iPod before disassembly. This reduces dangerous thermal-event risk if the battery is accidentally damaged during repair. If the battery is swollen, take appropriate precautions. This iPod case is unusually hard to open without damaging major components. Its metal faceplate, metal backing, and thirteen metal clips make disassembly especially demanding. Caution: this opening method can significantly damage the iPod beyond its current condition. Keep a few extra plastic opening tools nearby, since they are easy to ruin while opening the case. Confirm that the hold switch is locked before you open the iPod.
Opening this iPod is challenging, so do not get discouraged if it takes a few tries. Watch the plastic opening tool tip angle as you insert it into the iPod; keep it as vertical as possible while still clearing the rear panel edge. Guide a plastic opening tool into the seam between the front and rear of the iPod.
Slide a second plastic opening tool into the seam between the iPod front and rear, keeping the two tools at least 1.5 inches apart.
Working at an angle, carefully slide a putty knife about 1/8 inch into the gap between the two opening tools. You will find thin metal rails running along the inside of the back panel, so work very carefully when inserting the putty knife. After the putty knife clears the rear panel lip, rotate it vertical and carefully but firmly work it straight down through the opening tool gap.
Press on the rear panel behind the putty knife with your fingers to reduce bending. Slowly flex the putty knife so most metal tabs along this side of the iPod release. The idea is to control how the rear panel bends instead of trying to prevent all bending. Any side bend should draw the rear panel lip away from the iPod, not push outward on the curved surface. This also releases as many side clips as possible.
Take the putty knife out, then place it closer to the iPod corner and use the same gentle wiggle method. If possible, do not bend the rear panel corner.
Between the lock slider and headphone jack, guide a plastic opening tool into the seam between the front and rear of the iPod. It may be easier to flex the putty knife downward carefully to create more room for the opening tool. Be careful not to bend the rear panel corner.
Near the display center, carefully slide a metal spudger into the gap made by the plastic opening tool. A visible bump can form here in the rear panel and is hard to repair. When levering the tab free, pivot the metal spudger on the rear panel edge instead of bending the rear panel outward. With the metal spudger, release the single clip at the iPod top edge.
Near the other top corner, insert an opening tool into the gap between the front and rear of the iPod
On the other side, insert an opening tool into the gap between the front and rear of the iPod. It may help to angle the opening tool stuck in the top corner to create enough of a gap.
Take out the plastic opening tool from the top corner and slide it into the seam between the front and rear of the device, leaving at least 1.5 inches of space between the 2 tools (as done on the other side).
Working at an angle, carefully slide a putty knife about 1/8 inch into the gap between the two opening tools. Again, you will find thin metal rails running along the inside of the back panel, so work very carefully when inserting the putty knife. After the putty knife passes the rear panel lip, turn it vertical and carefully but firmly work it straight down through the gap between the plastic opening tools. Press on the rear panel behind the putty knife with your fingers to reduce bending. Flex the putty knife just enough to make sure most metal tabs along this side of the iPod release.
The metal clips near the corners grip the front panel tightly. Release these clips before opening the iPod. Carefully slide a metal spudger into the area beside the stubborn metal clip.
Gently work the metal spudger downward until it is fully seated in the rear panel.
Gently start releasing the clip from the front panel. A visible bump can form here in the rear panel and is hard to repair. When levering the tab free, pivot the metal spudger on the rear panel edge instead of bending the rear panel outward.
Use the metal spudger to apply upward pressure under the front panel until the metal clip releases.
You will find two ribbon cables connecting the rear panel to the remaining iPod assembly. In the following step, take care not to damage these ribbon cables. In this step, grasp the front-panel assembly with one hand and the back panel with the other. Pause for a moment before continuing. Very gently release the remaining rear-panel clips by pulling the tops of the front and rear panels apart, using the iPod bottom as a hinge. Take great care not to damage the ribbon cables joining the two halves.
The battery flex cable lock tab is very delicate. Pulling too far, or pulling on the connector's white portion, can tear it from the main board. If that happens, battery connector repair becomes very difficult. With angled tweezers or an opening tool, raise the brown lock latch straight up by 1 mm. Confirm you draw from both sides of the latch. Take care not to pull on the white portions extending to the connector's outer edges. Move the brown lock tab straight upward. The connector is fragile and can break if it shifts to the side. Grasp the flex cable with your fingers or tweezers and draw it straight up to detach it. If using tweezers, avoid grasping the cable too close to the socket or the cable contacts may short.
Set the rear panel beside the iPod, taking care not to strain the orange headphone jack cable.
Raise the hard drive with one hand to expose the headphone jack ribbon underneath. With a spudger, flip up the plastic tab securing the headphone jack ribbon in place. The tab can rotate up 90 degrees, releasing the ribbon cable. Move the orange headphone jack ribbon out of its connector. The rear panel is now released from the iPod.
After opening, check the rear-panel clips. If any clip bent upward, press it back down gently so the rear case can close cleanly.
Use the broad, flat face of the metal spudger to press the clip downward. Work carefully so the thin metal rail does not tear away from the rear panel. Flat pin-nosed pliers can reduce slipping and headphone jack damage risk. While shaping these clips, take care not to damage any headphone jack parts.
Set the rear panel on its side on a clean, hard surface. Carefully but firmly press it downward, rolling the full lip edge back into place. You may need to repeat this several times to straighten the sides well. Slightly overcorrecting the case edges inward is better than leaving them too far out, because reseating the front panel will bend the rear panel back into alignment. Once the rear panel is restored to good condition, continue with the iPod repair.
The battery sticks to the rear panel adhesive. As you remove it, take care not to tear the orange ribbons for the headphone jack or hold button. With a spudger, raise the battery and the attached orange cable out of the device. For this thin 80GB / 120GB route, keep the replacement cell within the thin rear case; a thick 160GB battery pack will not fit. If the battery is hard to remove, warm the iPod back with a hair dryer or heat gun to soften the glue holding the battery in place. Do not overheat the battery.
After This Repair
| Check | What to do |
|---|---|
| Charge and calibrate | Charge fully, let it stay on the charger a little longer, then use it through a normal discharge and charge cycle so the meter can settle. |
| Watch the internal stack | If the display shows pressure marks, dark spots, or case bowing after reassembly, reopen and check battery thickness and cable routing. |
| Still not working? | Check the dock connector, battery connector, storage load, and board power path before replacing another battery. |
Frequently Asked Questions
How do I know whether my 6G Classic needs the thin or thick battery path?
Use order number and case depth, not color or A1238 alone. MB029LL/A, MB147LL/A, MB562LL/A, and MB565LL/A are the thin 80GB / 120GB models at 10.5 mm / 0.41 in. MB145LL/A and MB150LL/A are the 2007 160GB thick-case models at 13.5 mm / 0.53 in.
Is the 120GB model a Late 2008 or 7th Gen iPod?
Parts catalogs describe MB562LL/A and MB565LL/A both ways. For battery fitment, the important part is that these 120GB thin models use the same 616-0229 battery path as the 80GB thin 6G Classic.
My iPod only works when plugged in. Is this the right battery?
It can be, especially when the iPod is a confirmed thin 80GB or 120GB Classic and it dies quickly when unplugged. Check the USB cable, charger, dock connector, and storage behavior first so a dock or hard-drive problem is not mistaken for a battery.
What does Charging, please wait mean?
A deeply discharged battery can stay on that screen for a while. Leave the iPod on known-good power for 30+ minutes, then reset with Hold off. If it never recovers and fitment is confirmed, the battery becomes a stronger suspect.
What if it still will not turn on after replacing the battery?
Reopen only far enough to inspect the brown battery latch, ribbon seating, headphone/Hold ribbons, and any connector touched during repair. If the iPod was dropped, wet, or corroded, board inspection comes before another battery.
What should I do with a swollen or expanded battery?
Stop charging it. Do not puncture, bend, compress, or throw it in household trash. Remove it only if it can be handled safely, then take it to a battery recycler or electronics drop-off.
Does this fit a 160GB iPod Classic?
No for the 2007 thick 160GB Classic, which uses 616-0232. The Late 2009 160GB thin Classic is a separate thin 160GB route that should be verified before ordering from this 80GB / 120GB page.
Battery Safety & Shipping
⚠️ Lithium-Ion / Li-Po Battery Safety. This product contains (or is) a rechargeable lithium-ion/lithium-polymer battery. Charge only with a compatible charger; don't leave it charging unattended or overnight, and unplug once fully charged. Avoid charging or storing in direct sunlight or other high-heat environments. Stop using and stop charging immediately if the battery swells, bulges, gets unusually hot, hisses, smokes, or leaks. Do not puncture, crush, bend, short-circuit, or try to "deflate" a swollen cell, and never press a lifted screen or case back down — it can rupture the cell. If electrolyte contacts your eyes, flush with clean water for 15 minutes without rubbing and seek medical care; on skin, wash with water and soap. Battery service should be done by a trained technician. Recycle through an electronics or universal-waste recycler, not household trash.
Shipping. A refurbished iPod shipped with its battery installed ships as UN3481 (lithium-ion batteries contained in equipment); a loose replacement cell shipped on its own ships as UN3480 (lithium-ion batteries). Cells have passed UN Manual of Tests and Criteria 38.3 testing.
Worth Knowing
- Apple did not publish original capacity for the thin 80GB / 120GB 616-0229 battery path; replacement-cell capacity varies by supplier.
- Start with battery replacement as cheaper fix
- Errors after battery replacement more likely indicate hard drive failure
Why people land on this part
Also searched as: battery affecting middle, anything the battery, swollen battery affecting, Replacement Battery (Thin — 80GB / 120GB) replacement, replace battery ipod classic 6th generation, ipod classic 6g battery replacement, ipod classic 6th generation 80gb battery replacement, battery won't charge, Won't Turn On, Battery Drain, Shuts Down Randomly, dead after battery, new battery, battery dies, battery life, charging please wait, not charge, replaced battery, battery connector, connect to power, expanded battery, not charging, doesn't charge, battery drained.
Some buyers search for "ipod classic 6th gen battery replacement", "ipod classic 6th gen battery", "ipod battery replacement", "ipod classic 6th generation 120gb battery replacement", "ipod classic 6th gen battery life", "ipod classic 80gb battery", "ipod classic 120gb battery", "still won't turn on after replacing the battery", "My iPod is stuck on Charging please wait", "Apple classified iPod Classic as obsolete September 2021", or "5G Video 30GB shares 616-0229 battery family"; confirm the checks above point to this same part before ordering.
You May Also Want
Flash storage can make an 80GB or 120GB thin Classic faster, quieter, and more reliable while the case is already open.
Related: Hard Drive Cable (Thin — 80GB / 120GB)Sad iPod, restore errors, or battery-like shutdowns can involve the thin hard-drive cable; inspect it during battery service.
Related: Replacement Hard Drive (80GB)Choose the exact 80GB or 120GB storage path if clicking, restore errors, or sad iPod symptoms point to the drive instead of the battery.