
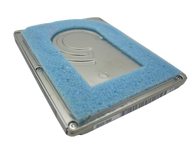
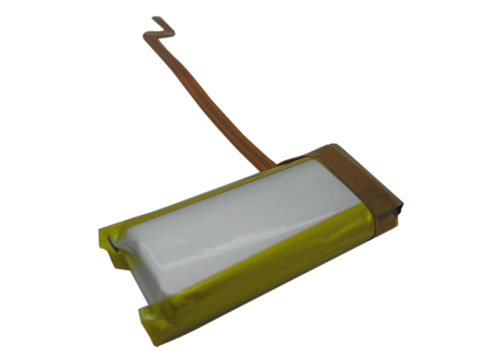
Representative photo. You receive the part named above.
iPod Classic 7G — Replacement Hard Drive 160GB (Late 2009)
Used (Apple Original) · Model A1238
$105.90
Sold out
Not for sale right now
We are not selling this part at the moment.
- Used (Apple Original). Tested: installed in a working iPod and checked before it ships.
- 1-year limited warranty · 30-day returns from delivery
- Free pry tool in the box
- Completed repairs aren't refundable. If a part we fitted fails within a year, we repair it again.
Part details
About this part
Overview
Replacement Toshiba MK1634GAL storage drive for the thin 160GB iPod Classic Late 2009. Use this listing for repeat clicking, sad iPod icon, red X, restore failure, or stuck-on-Apple-logo storage behavior after the ZIF cable and battery load have been checked.
Fitment snapshot
Confirm Late 2009, 160GB capacity, thin case, and order number; A1238 by itself is not enough.
Product Overview
If you searched for ipod classic 7th generation hard drive replacement, use this listing to confirm the thin 160GB iPod Classic Late 2009 storage path before buying.
Searchers also shorten that to ipod classic 7th gen hard drive replacement; the same fitment details apply.
This is the thin-case 160GB iPod Classic from Late 2009. The earlier thick-case 160GB Classic uses a different drive form factor, and the earlier 120GB Classic uses a different storage path even though A1238 appears across the family.
What Is Included
Condition: Used factory-original part. Quantity and exclusions: The listed part, set, pair, or configuration above is supplied with exactly one plastic pry tool. No other parts, tools, adhesives, or materials are included unless they are explicitly listed above.
Fit and specs
Specifications & Fitment
Part Details
| Detail | Value |
|---|---|
| Model Number | A1238 |
| EMC | EMC 2173 |
| Condition | Used — factory original Apple part. Normal cosmetic wear expected. |
| Apple identifier | A1238 / EMC 2173 / Late 2009 |
| Factory drive | Toshiba MK1634GAL
|
| Capacity | 160GB |
| Interface | PATA / Parallel ATA through ZIF-40 |
| Drive profile | 5mm single-platter, 4200 RPM, 8 MB cache |
| Cache | 8 MB |
| Form Factor | 1.8" PATA/ZIF-40 |
Compatible Variants
| Order Number | Capacity | Color | Case | Compatible | Notes |
|---|---|---|---|---|---|
| MC297LL/A | 160GB | Black | thin | Yes | — |
| MC293LL/A | 160GB | Silver | thin | Yes | — |
| MB147LL/A | 80GB | Black | thin | No— capacity-capped on this board |
MK1634GAL is the Late-2009 thin ZIF drive. On a 2007 80GB (board 820-2168) and stock Apple firmware the addressable ceiling is about 128GB, so it will not show its full 160GB there. Unit sold under the iPod Classic 6th Generation pages. |
| MB565LL/A | 120GB | Black | thin | No— capacity-capped on this board |
MK1634GAL is the Late-2009 thin ZIF drive. On a Late-2008 120GB and stock Apple firmware the addressable ceiling is about 128GB, so it will not show its full 160GB there. Unit sold under the iPod Classic 6th Generation pages. |
| MB150LL/A | 160GB | Black | thick | No— thick-case 2007 160GB part set | The 2007 thick 160GB rear case, battery, hard drive, HDD cable, bumpers and headphone jack are not compatible with thin models; sold under the iPod Classic 6th Generation pages |
| MB145LL/A | 160GB | Silver | thick | No— thick-case 2007 160GB part set | The 2007 thick 160GB rear case, battery, hard drive, HDD cable, bumpers and headphone jack are not compatible with thin models; sold under the iPod Classic 6th Generation pages |
is not compatible with
- iPod Classic Late 2008 120GB - same A1238 family, different drive path
- iPod Classic Late 2007 thick 160GB - different thick-case drive form factor
- iPod 5th / 5.5 Generation Video and earlier ZIF or 50-pin storage paths
Install and repair
Repair considerations
Run these checks before replacing the hard drive — they confirm the hard drive is the right fix and not a nearby fault:
- Restore/format steps can erase data or indicate storage failure
- Treat ribbons, tabs, and ZIF connectors as fragile
- Use reset, Disk Mode, restore, or iTunes/Finder behavior as a software/storage check
- Reseat or inspect ribbon cable and connector seating
- Inspect ZIF latch, socket, or clamp condition
- Check drive noise, SMART/data signs, or storage recognition
Install Overview
This is a very difficult no-solder drive replacement. The Repair Guide below carries the install summary and the 25 hard-drive steps.
Before You Start
The thin Classic shell has 13 metal clips. Work slowly and avoid bending the front or rear panel.
The repair guide uses a thin putty knife and plastic tools. Keep the blade shallow so the case and clips are not gouged.
The headphone/hold ribbon and battery ribbon connect the case halves. Do not pull the halves apart after the clips release.
Straighten and align damaged clips before reassembly so the thin rear case can close evenly.
Seat the ZIF cable, confirm the drive is detected, and attempt restore before pressing the case fully closed.
Disassembly Guide
Disassembly guide summary: iPod Classic Hard Drive Replacement.
Show all 25 installation steps
This iPod case is unusually hard to open without damaging major components. Its metal faceplate, metal backing, and thirteen metal clips make disassembly especially demanding. Caution: this opening method can significantly damage the iPod beyond its current condition. Keep a few extra plastic opening tools nearby, since they are easy to ruin while opening the case. Confirm that the hold switch is locked before you open the iPod.
Opening this iPod is challenging, so do not get discouraged if it takes a few tries. Watch the plastic opening tool tip angle as you insert it into the iPod; keep it as vertical as possible while still clearing the rear panel edge. Guide a plastic opening tool into the seam between the front and rear of the iPod.
Slide a second plastic opening tool into the seam between the iPod front and rear, keeping the two tools at least 1.5 inches apart.
Working at an angle, carefully slide a putty knife about 1/8 inch into the gap between the two opening tools. You will find thin metal rails running along the inside of the back panel, so work very carefully when inserting the putty knife. After the putty knife clears the rear panel lip, rotate it vertical and carefully but firmly work it straight down through the opening tool gap.
Press on the rear panel behind the putty knife with your fingers to reduce bending. Slowly flex the putty knife so most metal tabs along this side of the iPod release. The idea is to control how the rear panel bends instead of trying to prevent all bending. Any side bend should draw the rear panel lip away from the iPod, not push outward on the curved surface. This also releases as many side clips as possible.
Take the putty knife out, then place it closer to the iPod corner and use the same gentle wiggle method. If possible, do not bend the rear panel corner.
Near the headphone jack, guide a plastic opening tool into the seam between the front and rear of the iPod. It may be easier to flex the putty knife downward carefully to create more room for the opening tool. Be careful not to bend the rear panel corner.
Near the display center, carefully slide a metal spudger into the gap made by the plastic opening tool. A visible bump can form here in the rear panel and is hard to repair. When levering the tab free, pivot the metal spudger on the rear panel edge instead of bending the rear panel outward. With the metal spudger, release the single clip at the iPod top edge.
Near the other top corner, guide a plastic opening tool into the seam between the front and rear of the iPod
On the other side, use the opening tool to start the same case-opening gap. It may help to angle the tool stuck in the top corner to create enough room.
Take the opening tool out of the top corner, then slide it into the seam between the iPod front and rear. Keep at least 1.5 inches between the two tools, as on the opposite side.
Working at an angle, carefully slide a putty knife about 1/8 inch into the gap between the two opening tools. Again, you will find thin metal rails running along the inside of the back panel, so work very carefully when inserting the putty knife. After the putty knife passes the rear panel lip, turn it vertical and carefully but firmly work it straight down through the gap between the plastic opening tools. Press on the rear panel behind the putty knife with your fingers to reduce bending. Flex the putty knife just enough to make sure most metal tabs along this side of the iPod release.
The metal clips near the corners grip the front panel tightly. Release these clips before opening the iPod. Carefully slide a metal spudger into the area beside the stubborn metal clip.
Gently work the metal spudger downward until it is fully seated in the rear panel.
Gently start releasing the clip from the front panel. A visible bump can form here in the rear panel and is hard to repair. When levering the tab free, pivot the metal spudger on the rear panel edge instead of bending the rear panel outward.
Use the metal spudger to apply upward pressure under the front panel until the metal clip releases.
You will find two ribbon cables connecting the rear panel to the remaining iPod assembly. In the following step, take care not to damage these ribbon cables. In this step, grasp the front-panel assembly with one hand and the back panel with the other. Pause for a moment before continuing. Very gently release the remaining rear-panel clips by pulling the tops of the front and rear panels apart, using the iPod bottom as a hinge. Take great care not to damage the ribbon cables joining the two halves.
With a spudger, slide the connector upward where it holds the orange battery ribbon. Lift the locking bar only about 2 mm to release the cable. Move the orange battery ribbon out of its connector.
Set the rear panel beside the iPod, taking care not to strain the orange headphone jack cable.
Raise the hard drive with one hand to expose the headphone jack ribbon underneath. With a spudger, flip up the plastic tab securing the headphone jack ribbon in place. The tab can rotate up 90 degrees, releasing the ribbon cable. Move the orange headphone jack ribbon out of its connector. The rear panel is now released from the iPod.
After opening, check the lower-case clips. If any clip bent upward, press it back down gently so the rear case can close cleanly.
Use the broad, flat face of the metal spudger to press the clip downward. Work carefully so the thin metal rail does not tear away from the rear panel. While shaping these clips, take care not to damage any headphone jack parts.
Set the rear panel on its side on a clean, hard surface. Carefully but firmly press it downward, rolling the full lip edge back into place. You may need to repeat this several times to straighten the sides well. Slightly overcorrecting the case edges inward is better than leaving them too far out, because reseating the front panel will bend the rear panel back into alignment. Once the rear panel is restored to good condition, continue with the iPod repair.
Rotate the hard drive out of the framework, then set it with the connector facing upward. With a spudger, lift the small black locking tab for the orange hard drive ribbon. The tab rotates upward 90 degrees and frees the ribbon cable.
Move the orange hard drive ribbon cable straight out of its connector. If the replacement hard drive did not include rubber mounting brackets or foam padding, transfer those parts from the old drive.
Product-specific placement, reassembly, and check
- Prepare and access. Confirm the exact model and listing fit first. Use the existing steps as a disassembly guide, gather the specified tools, disconnect power where applicable, and keep screws and cable positions organized.
- Place Replacement Hard Drive 160GB (Late 2009). Seat the exact storage part, cable, or adapter in the original storage path and match its orientation, case depth, and supported configuration.
- Reassemble without force. Reverse only the access steps needed for this repair, keep cables clear of case edges and screw posts, and close clips in stages.
- Validate before final closure. Before final closure, verify detection, Disk Mode or restore behavior as applicable, and stable startup without repeat clicking or a loose connection.
Stop condition: Stop if a connector, latch, screw, clip, housing edge, or the replacement part resists normal alignment. Recheck model fit, orientation, cable routing, and trapped hardware instead of forcing it.
Troubleshooting
Quick Diagnosis
Start by separating storage failure from cable seating, battery load, and restore state. Storage warnings are useful clues, not automatic proof that the drive itself is bad.
| What you see | Check first | Hard drive makes sense when |
|---|---|---|
| sad iPod icon, clicking, or restore loop | Reseat the ZIF drive cable, confirm the battery is stable under drive load, and try disk mode before replacing storage. | Drive replacement is more likely when repeat clicking or failed restore remains after cable seating and power checks. |
| iPod classic stuck on Apple logo | Try a force restart, disk mode, and restore. Watch whether the drive spins, clicks, or fails to mount. | Storage is plausible when the iPod repeatedly stalls at startup and the drive cannot mount or restore. |
| iPod classic won't restore or shows an iTunes restore error | Use iTunes 9.0 or later for the Late 2009 Classic, then check cable, port, disk mode, and restore state. | A replacement drive makes sense when restore consistently fails at the storage stage after software and cable checks. |
| red X iPod or red X icon | Treat red X as a storage-detection warning: the iPod cannot find its storage drive. Reseat the ZIF cable first. | Replace the drive when a known-good cable and connector still leave storage undetected. |
| Stuck in Disk Mode | Reset (hold Menu + Center until the Apple logo), then Disk Mode (reset, then hold Center + Play/Pause) if needed, and attempt a clean restore. | Drive replacement is more likely when disk mode cannot mount or exits back to the same storage warning. |
| Shuts off when the drive spins up | Test battery condition and charger behavior first; weak power can collapse when the drive starts. | The hard drive is a better suspect when battery load is stable and the drive still clicks, stalls, or fails detection. |
When This Hard Drive Helps
| Symptom | What it means & what to check |
|---|---|
| The mechanical drive clicks or cannot mount | Repeated clicking, stalled spin-up, or a drive that will not mount after cable reseating is one of the cleaner signs that the MK1634GAL route may be the right repair. |
| Restore fails after software and cable checks | Use iTunes 9.0 or later, check the USB cable and port, and try disk mode before blaming the drive. Failed restore becomes a storage clue when those checks are clean. |
| The iPod reports sad iPod, red X, or startup-loop behavior | These warnings mean the Classic cannot reach a usable storage path. Check the ZIF cable and battery load first, then replace the drive when the storage path remains failed. |
| You want the original mechanical-drive path | This listing is for a replacement iPod Classic 7th gen hard drive. If you want an SD-card or flash-storage upgrade, use the flash-mod route instead. |
| click of death, grinding, clicking sounds on start and red cross in circle | Mechanical clicking or grinding points toward the drive after the hard-drive cable has been reseated and checked. |
| folder icon, apple.com/support, showing a folder, red X after hard drive replacement | These warnings mean the iPod cannot reach a usable storage path; check the cable first, then the drive. |
| boot loop, recovery mode, not recognized, error 1416, error 1429, error 1439, error code, error message, iTunes Error, Reboot Loop, restore option, restore process, Stuck in Recovery Mode, how do i restore an ipod to factory settings, how to restore ipod to factory settings, need to format but not recognized by the computer | Treat this as a restore or storage-path symptom, not proof of a bad drive; the drive becomes more likely when cable, USB, formatting, and restore checks still lead back to storage warnings. |
| frozen, skipping, drive already corrupted, drive was corrupted, brand new hard drive already corrupted | Playback skips, freezes, or corrupted data become drive clues when they happen during storage access or sync. |
Diagnose first when
- Listen for repeat clicking or repeated spin-up attempts before replacing storage parts.
- Inspect for liquid, corrosion, residue, torn flex material, or connector damage.
- Reopen only as far as needed to inspect the areas touched during the repair.
Do Not Buy This Hard Drive Yet If...
| Situation | Start here instead |
|---|---|
| You have a 120GB Classic | Use the Late 2008 120GB route instead. It shares the A1238 family label but is not this Late 2009 160GB drive page. |
| You have a thick 160GB Classic | Use the earlier thick-case 160GB route. The thick drive stack is a different form factor from the thin Late 2009 drive. |
| The ZIF cable or latch has not been checked | Inspect and reseat the iPod classic hard drive cable before blaming a second storage device. |
| You want an SD-card or flash-storage upgrade | Use the flash-mod page instead of buying another mechanical hard drive. |
| The symptom appears only under power load | Test battery condition first. A weak battery can shut the iPod down when the drive spins up. |
| No disk-mode or restore check has been tried | Reset: hold Menu + Center until the Apple logo. Disk Mode: reset, then hold Center + Play/Pause. Restore with compatible software before ordering. |
Worth Knowing
- The 7G Late 2009 160GB route uses the Toshiba MK1634GAL PATA/ZIF-40 drive in the thin A1238 / EMC 2173 iPod Classic.
- A1238 alone is not enough because earlier Classic revisions also use A1238. Confirm Late 2009, 160GB capacity, and order number before ordering.
- The thick 160GB Classic and the Late 2008 120GB Classic are separate storage paths.
- Packing out a mechanical drive that sits looser than its bay is something we confirm case by case: tell us the exact case and drive first, because this model left the factory as a thin build with its own drive bumpers. Foam or thermal pads are the adapter maker's advice for a flash board, not for a spinning drive.
Stuck on the Apple Logo / Boot Loop: What Owners Actually Run Into
A 7th generation Classic frozen on the white Apple logo — or flashing it and restarting over and over in an endless boot loop — is failing partway through startup, usually because it cannot read its hard drive or cannot hold enough power to finish booting. The frustrating part on this model is that a worn-out battery, a failing drive, a loose drive ribbon cable, a flash-mod setup mistake, and even an oversized music library all end in the same looping logo. A few minutes of listening and two button combinations usually separate them — and decide whether you need a battery, a drive, an inexpensive cable, or no part at all.
Anecdotal owner reports (not a guarantee or authoritative proof): - A 7th gen owner plugged the iPod in and found the screen stuck on the Apple logo, flickering on and off "almost like a boot loop" — the classic first sighting of this failure, before any icon or error appears. - Another 7th gen owner watched the Apple logo appear but the menu never load; from time to time the screen asked to connect to iTunes and restore, but the restore never took. That mix — logo, no menu, restore prompt that fails — points at storage the firmware can see but cannot reliably read. - An A1238 owner replaced the 160GB hard drive because the original was defective — and got a never-ending restart cycle instead: Apple logo for a few seconds, shutdown, restart, forever. Disk mode still worked and the computer could even read the new drive's contents, but iTunes could not see it. A new drive that loops like this is nearly always a seating or restore/format problem, not a second dead drive. - A 7G thin 160GB owner did a careful battery swap and the iPod came out apparently dead — except for a faint Apple logo flashing for a split second, endlessly, whenever plugged in. Reinstalling the original battery brought it straight back to life. The replacement cell, not the repair, was the problem: a bad or badly seated new battery produces a textbook boot loop. - An owner upgraded a 7th gen with a dual-slot ZIF adapter and two 250GB SSDs; afterward the Apple logo reset every 5-10 seconds and the PC could not see the iPod at all, even after reseating the adapter cable. Boot loops that begin immediately after a storage conversion are a setup problem — format, slot order, restore — far more often than failed hardware. - A buyer of a refurbished 160GB 7th gen had it run perfectly while plugged in, then crash the instant the cable came out and reboot endlessly — while the battery icon claimed a full charge and even the built-in diagnostics showed maxed battery readings. The drive's counters showed nearly 100,000 start/stop cycles. Two restores changed nothing: the cell itself was done, and the "full" reading only reflected charger power. - Another owner bought a 7th gen already stuck at the Apple logo, worked it into disk mode, and ran the drive's health check — no bad sectors. The drive behaved identically when tested in a second iPod, clearing the logic board and connector. The trail ended at drive formatting: a drive set up on the wrong system can leave the iPod booting to a logo it can never get past, with nothing physically broken.
How it usually progresses: - When the drive is the cause, it rarely fails all at once. The usual arc: songs skip or cut off and syncs stall, boots get slow or hang at the logo for minutes before succeeding, then audible clicking or whirring appears at startup, and finally the logo gives way to a red circle-with-X — this generation's replacement for the old "sad iPod" face — or the iPod simply loops. Each stage is the drive losing more of its ability to read. - When the battery is the cause, the arc is different: runtime shrinks over months, then the iPod only works plugged in, and finally — on battery — it can manage nothing but a dim Apple logo flashing every couple of seconds. In the worst stage the reboot cycle is so fast owners report being unable to even enter disk mode between restarts. - A long-stored unit adds one more stage: deeply drained cells can hold the iPod at "Charging, Please Wait" for a long time, because the iPod can only trickle-charge on that screen and cannot charge at all during the Apple-logo part of a boot attempt. A looping unit with a weak cell can stay trapped this way — which is why a long, patient session on a USB wall adapter comes before any verdict.
What typically causes it: - Startup on this iPod has one job it cannot skip: power up the drive, mount it, and read the operating system and music database off it. When any step fails, the iPod either hangs on the Apple logo or gives up and resets to try again — the boot loop you are watching is the iPod retrying the same failed startup over and over. - The most valuable tell in all of Classic repair is timing. If the Apple logo flips to a folder icon almost immediately, the hard drive ribbon cable is the usual fault — it friction-fits into its connector and works loose. If the iPod hangs on the logo for several seconds before erroring, the drive itself has failed. A repair technician cited in the research sees it constantly: a large share of iPods on the bench just need the cable reseated or replaced. Mixing these two cases up is the single most common misdiagnosis — owners buy a whole drive when a cheap cable was the fix. - A worn-out battery impersonates a dead drive almost perfectly. Spinning up the hard drive takes a surge of current; an aged cell with high internal resistance lets the voltage collapse mid-boot, the iPod resets, and the cycle repeats — a faint, flashing Apple logo every few seconds. A battery flex cable left slightly loose after a repair causes the same repeating reboot. This is why the standard advice is to charge on a USB wall adapter for a long stretch before condemning any hardware. - On big flash-upgraded builds there is a boot loop with nothing broken at all. The 7th gen loads its entire music database into memory at startup; past roughly 40,000-50,000 tracks the database no longer fits, the system crashes while loading it, automatically restarts, and crashes again — an endless loop on perfectly healthy hardware. The exact ceiling shifts with how much artwork and metadata your tracks carry. - Flash-storage conversions add their own boot-loop causes: shuffling SD cards between slots of a multi-slot flash-storage adapter after a restore leaves duplicate boot partitions across cards, which produces hangs and spontaneous reboots; cards formatted exFAT or NTFS cannot be read by the iPod at all (it needs FAT32 with an MBR layout, or Mac HFS+) and boot-loop until reformatted; and some card families are known troublemakers in these adapters — some SD card/controller combinations/Extreme cards cause skipping and random reboots, Kingston Canvas cards near-guarantee errors or endless boot loops. - Two things this is NOT on the 7th generation: the 6th gen's well-known reboot bug with storage over 128GB does not exist here — this model handles large drives natively, so capacity alone never causes the loop. And a tired battery does not cause the red circle-with-X icon; that icon specifically means the iPod cannot communicate with its storage (drive, cable, or adapter), which keeps the battery and drive cases from being confused once an icon appears.
Handle it safely: - The battery connects through a small 5-pin connector with a brown locking latch on the board. If you open the iPod chasing a boot loop, lift the latch and withdraw the battery ribbon straight along its insertion direction — pulling it sideways or at an angle can rip the entire connector housing off the board and destroy the power traces under it, turning a battery-sized repair into a dead logic board. That damage is one of the most common ways a fixable boot loop becomes an unfixable iPod. - The hard drive cable's brown locking latch is equally unforgiving: if the latch breaks, the cable can never clamp properly again, and the iPod is left with intermittent drive detection — a permanent, maddening boot-loop generator that no new drive fixes. Flip the latch gently and never force the ribbon while the latch is closed.
Owners searching for this describe it as: ipod classic stuck on apple logo, ipod classic 7th gen boot loop, ipod classic keeps restarting apple logo, ipod classic restarts over and over, ipod classic flashing apple logo, ipod classic won't boot past apple logo, ipod classic apple logo then red x, ipod classic endless reboot, ipod classic only works when plugged in, ipod classic restore loop, ipod classic boot loop after flash adapter, a1238 continually restarts.
What Owners Report
These are anecdotal owner reports, not guarantees or authoritative proof that a particular part will fix a symptom. Use them as a troubleshooting starting point: confirm the symptom, run the quick checks, then match the fix.
Sad face, red X, or clicking — the drive-failure playbook
Symptoms. Red X in a circle pointing at the support site; sad-face icon; rhythmic clicking or tap-tap-clunk from inside; freezes at 1,500 songs then iTunes locks; lights up but won't play; died after a drop, a dunk, or sitting on a strong magnet.
What it is. The iPod cannot read its storage — the drive, its ribbon or, on a converted unit, the adapter. Red X with clicking is the pattern owners most often traced to the drive; a silent red X can still be the ribbon or its seating.
Check first. Copy off anything that exists only on it while it still mounts (Disk Mode). Charge fully, reseat and inspect the ribbon, then read the diagnostics' drive tests: rising sector counts across two runs point at the drive, but no single reading or bench test is a verdict — compare a known-good drive, cable or adapter if you can. Still playing but clicking and crawling: copy your music off now and have the drive looked at — no one can say how long it has. Soaked: stop powering it and have it inspected before any test.
Fix. Drive and ribbon together, or a flash conversion (same disassembly). Reported by 35 owners — the most-reported issue on this model.
Still a red X after replacing the drive
Symptoms. Brand-new drive fitted and the red X is back; loads only a few gigabytes then clicks and resets; new drive won't enter Disk Mode; replaced everything and it still fails.
- A blank drive shows a red X until it is restored: Disk Mode (reset, then Center + Play/Pause), connect, restore — judge only after a completed restore.
- Ribbon fully in at both ends with the clip flipped (more than one white line of the cable end showing means not seated) and no creases.
- Cable matched to the drive fitted — drive makers use different cables, and the code is printed on the cable.
- The replacement itself can be faulty: test it on a bare-drive adapter before returning anything or buying a board.
- Flash build: the adapter's seating and the cards as well.
Only after power, cable and a completed restore check out is the board's drive connector the remaining suspect. Loading a few gigabytes, then a click and a reset, is a drive-or-cable signature, not a capacity setting. Reported by 11 owners.
Restore, Disk Mode, and format behavior after storage work
Symptoms. Partial sync then an error and an empty iPod; won't restore, red X returns mid-restore; stuck in Disk Mode with iTunes blind to it; restore completes then hangs at the logo on reboot; CRC (redundancy-check) errors; "0 KB free" after a sync; a sad face after a fresh drive; a noisy drive that freezes during every restore; iTunes claiming files are "in use".
- Reset (Hold toggle, then Menu + Center), a rear USB port — never a hub or keyboard port — and a charged battery; copy off anything that exists only on the iPod, then follow the Restore & sync steps once.
- Syncs die at the same point, or CRC errors while copying: bench-test the drive on a bare-drive adapter before formatting again.
- Restore succeeds but every reboot hangs at the logo: if it stays up unplugged in Disk Mode, suspect the software; if it dies unplugged, suspect the battery.
- Stuck in Disk Mode: Menu + Center exits it.
"0 KB free" after a sync, iTunes saying files are "in use", a sad face on a fresh drive, or a format that never sticks: copy off what you need, put the iPod on a rear USB port with a charged battery, then follow Restore & sync once; if the same error returns on a known-good computer, cable and power source, have the drive and its ribbon tested rather than formatting again. On a flash build, test the cards separately. Errors that follow one computer and vanish on another are host-side. Reported by 8 owners, plus 5 corruption cases.
Computer won't recognize it — drive-side cases
Symptoms. iTunes and the file explorer freeze the moment it connects; resets fine and shows the logo but no computer sees it; the restore prepares, then the iPod disconnects itself; "selected device could not be found" after an interrupted restore.
Check first. The cable (no corroded or bent contacts), a different USB port on the computer itself, and enough charge to turn on — a flat battery is never recognized; then a second computer. A host that freezes on connect can be a drive struggling to read, but a damaged ribbon looks the same: copy off what you can, reseat the ribbon, read the diagnostics' drive tests, then bench-test on a bare-drive adapter. If the built-in diagnostics stop at a FireWire test that reads as waiting, treat that as an unresolved result — it does not by itself identify a bad port or drive; run the cable and computer checks and read the drive tests instead.
Self-ejecting mid-restore: same list — cable and port, then power, then drive and ribbon; the diagnostics' drive counters are a pointer, not a verdict.
Fix. Drive and cable together once the tests say so; if the drive mounts clean externally, look at the battery and board side instead. Reported by 4 owners.
Strange noises with corrupt transfers
Symptoms. "Corrupted" verdicts when copying files off; a strange noise and a restore that does nothing, stuck at the logo; boots slowly (minutes at the logo) and then iTunes still can't see it.
What it is. Odd noises, long logo hangs and files that arrive corrupted are warning signs in the storage path — a same-model repairer's read of that description was a failing drive, given "without actually hearing/seeing it". Copy off what you still can, first.
Check first. Connection and power before any drive decision: a weak battery can collapse when the drive spins up and mimic a dead drive, so charge fully and use a rear USB port; then reseat the ribbon and read the diagnostics' drive tests. On Windows, an iPod that mounts but never appears may lack a drive letter — look in Disk Management before condemning parts.
Fix. Drive and ribbon together when the tests point there. Reported by 3 owners.
Pauses when bumped — drive shock and data rescue
Symptoms. Pauses (but doesn't shut off) at the slightest pocket bump; needs data off a drive that no longer talks to the board; wondering about oversized replacement drives.
What it usually is. Two different things pause a Classic on a knock: the headphone plug — pulling it, or a worn jack losing contact for an instant, pauses playback by design — and the storage losing contact for a moment (the drive, its ribbon or a missing bumper). Owners report both; the pause alone does not say which part.
Check first. Another pair of headphones, plug pressed fully home. Then open it, reseat the drive ribbon, and confirm both drive bumpers are present and seated. Foam padding is the adapter maker's advice for a flash board, not a proven cure for a spinning drive.
Data off a drive the board no longer talks to: see the recovery question. Oversized drives: see the bigger-drives card. Reported by 3 owners.
Bigger drives in this generation — what actually works
Symptoms. Eyeing a 240GB-class 1.8" drive; asking whether big drives that confuse earlier Classics work here; wanting an upgrade from the stock drive.
What works. This page's route is the original thin 160GB drive class. The 240GB drive owners find online is listed by its seller as a thick drive for the thick case — not a drop-in part for this thin case. A thicker conversion needs an explicitly matched thick rear case and parts — check every part before attempting it.
More than 160GB. The route with same-model evidence behind it is flash — a card adapter on the drive ribbon (a flash-mod kit). On stock Apple firmware this late-2009 Classic addresses large flash builds: the adapter maker's guidance for this model is 256GB to 1TB on its dual- or quad-card adapters, with a library ceiling of roughly 50,000 tracks; bigger builds, SSD variants and each card combination need their own confirmation. The earlier Classics and the iPod with video are a different platform with their own drives, cables and storage rules — see their own pages. Reported by 3 owners.
Choosing a compatible replacement drive
Symptoms. Broken drive, shopping for a replacement; unsure which capacities and models fit; adapter or flex-cable mismatch worries.
What fits. Match the drive and the cable to this exact build: this page's route is the late-2009 thin Classic and its 1.8-inch ZIF drive class. Taller drives sold for the earlier thick case are not drop-in parts here.
Cables. Pair the cable with the drive you fit — cables made for different drive brands differ, and the identifying code is printed on the cable. No blanket rule says every earlier cable is wrong, and none fits everything: check the cable page's fitment list first.
The earlier Classics and the iPod with video are a different platform with their own drives, cables and storage rules — see their own pages. Seat the ribbon fully at both ends and close the clip before judging a new drive. Reported by 4 owners.
Salvaged and parts-bin drives — what to check first
Symptoms. Upgrading with a parts-bin drive from another unit; aftermarket connector doubts; wondering why one particular 160GB drive won't swap.
Treat it as a fit question: check the donor drive, its cable and the case it is going into against this page's fitment list before committing. One earlier Classic shipped its drive on a different interface class with its own ribbon, answered on that model's page: a salvaged drive that refuses where others work may simply be from the wrong family.
Owners also report aged salvage drives failing their first sync. Reported by 2 owners.
Flash and SSD storage upgrades — what works on this generation
Symptoms. Aging hard drive racking up reallocated sectors and sync failures; wants silence, battery life, or more capacity; asking which flash route fits; capacity halved after a board swap on an already-converted unit.
What works. An SD/microSD card adapter on the drive ribbon — the route the adapter maker recommends for this model. On stock Apple firmware this late-2009 Classic addresses large flash builds: the adapter maker's guidance for this model is 256GB to 1TB on its dual- or quad-card adapters, with a library ceiling of roughly 50,000 tracks; bigger builds, SSD variants and each card combination need their own confirmation. Four 256GB cards make 1TB, not 2TB.
Halved after a board swap. Confirm the replacement board is a late-2009 board before blaming the cards. The earlier Classics and the iPod with video are a different platform with their own drives, cables and storage rules — see their own pages.
Caution. Bad or fake cards are the maker's most common cause of a library that vanishes or needs restoring again — run a full-capacity write test before installing, and prepare the card for the computer you restore on (FAT32 for Windows, Mac OS Extended for the maker's Mac route). Reported by 5 owners.
Red X, zero capacity, or recovery loops after a flash conversion
Symptoms. Red X at boot and diagnostics can't detect the storage after a conversion; available memory reads zero kilobytes and extras won't run; drops into recovery mode every time it's unplugged; recurring corruption on brand-new flash media.
Check first (the adapter maker's own list): the adapter seated the right way round; the drive ribbon fully inserted at both the adapter and iPod ends and not damaged; the cards — pull them and see whether the screen changes; then stable power (charged battery, rear USB port). A working replacement card narrows the fault but does not by itself prove the first card was counterfeit — test it in a card reader with a full-capacity write test.
Recovery mode on unplug, or "needs restoring again" after a sync: the maker names two causes — bad or fake cards, or a library too large for the iPod. Corrupt characters on the diagnostics' storage screen point at the ribbon. On Windows, an iPod that mounts but never appears may lack a drive letter — look in Disk Management before condemning parts. Prepare the card for the computer you restore on: FAT32 for a Windows restore, or Mac OS Extended (Journaled) for the adapter maker's documented Mac route; third-party firmware has its own requirements — check them separately. Reported by 3 owners.
Wheel, center button or one button unresponsive
Symptoms. Center button clicks but doesn't register; one button dead while the rest work; scrolling works but no presses register; whole wheel dead at once; wheel only changes volume; frozen on one song; buttons intermittent, worst while the drive is spinning.
What it is. Buttons only actuate switches on the board, so the fault can be the wheel, its ribbon or the board side — one symptom does not name it.
Check first. Hold off, then reset (Menu + Center to the Apple logo). The built-in click-wheel test — reset, then Previous + Center as the logo appears — shows whether presses reach the board. Check the wheel ribbon sits flat and clipped, and the drive cable too: a disturbed one mimics a wheel fault.
Fix. Several dead controls point to the click-wheel assembly; one dead button a new wheel does not cure is board-side. Reported by 22 owners.
Docks, 30-pin cables, car kits and a broken port
Symptoms. Blinks on and off with a faint click when plugged in, nothing when unplugged; boots only on a powered dock; a dock with a built-in display gets audio but no picture; a new car won't recognize it over USB-C; the 30-pin connector is physically broken.
Power first. Blinking on cable power with nothing on battery is a power question: check the battery, its connector and another cable before the port. The faint click is usually the drive spinning up.
Separate the paths. Over FireWire this iPod charges only; USB carries sync as well. Tell us the exact dock or car accessory — owners report old docks giving sound but no picture, and a plug adapter cannot add video or a protocol an accessory needs.
Fix. A broken 30-pin connector is soldered to the board: it needs a board-level assessment, not a bezel. Reported by 5 owners.
Questions
Common Questions
How do I tell if I have a 7th Generation iPod Classic?
Look for the Late 2009 160GB thin-case Classic with A1238 / EMC 2173 and order number MC293LL/A or MC297LL/A. If yours is 120GB or a thick 160GB unit, use a different drive path. Every metal-front Classic says A1238, so the model number alone cannot tell you which one you have. This page is for the late-2009 thin 160GB (MC293LL/A silver, MC297LL/A black). Apple's figures for it are 140 g and 10.5 mm deep — supporting checks, not proof: a replaced case, drive or battery changes the weight, so on a modified or refurbished unit ask for the order number or a look at the board before ordering. Which parts carry over from the earlier thin Classics varies part by part — trust each part page's fitment list, not the A1238 marking. The earlier Classics and the iPod with video are a different platform with their own drives, cables and storage rules — see their own pages. Whether an earlier Classic's screen fits is answered on the screen page.
What does a red X or sad iPod icon mean?
A red X is the iPod's own diagnostic saying it cannot use its hard drive. A sad-face iPod icon is the same message in the older style: it cannot use its hard drive. A screen pointing at Apple's iPod support page is a storage error, not a message from us — the iPod could not start from its own drive. A red X right after a blank drive goes in is expected — there is no software on it yet. Check the ZIF ribbon cable seating first, then Disk Mode (reset with Menu + Center, then hold Center + Play/Pause). Repeated clicking after those checks points more strongly at the drive.
Can I use a flash adapter instead of replacing the hard drive?
Yes. A flash-storage adapter with an SD card removes the mechanical failure point. For Apple firmware, SDXC cards of 64GB or larger should be prepared as FAT32; third-party bootloaders may differ.
Why does my iPod Classic not appear in iTunes or Finder?
The 7G Late 2009 Classic requires iTunes 9.0 or later. On current macOS, you may need the Apple Music app, or a Windows PC running iTunes for Windows, or the newer Apple Devices app. Check cable, port, Disk Mode, and restore state before assuming a drive problem.
What if the iPod shuts off when the drive spins up?
A weak battery can cause shutdowns under drive load. Test the battery and charger before replacing the drive, especially when the iPod starts normally until storage spins up.
Restore & sync
iTunes cannot see my iPod, or says it is corrupted and the restore fails with an error number. What now?
Owners describe it as: iTunes calls the iPod corrupted and the restore fails with an error number (1439 is the one most often named); a red X in a circle, sometimes with clicking; "Use iTunes to Restore" on boot while iTunes sees nothing; the connect screen flips to the Apple logo and it reboots endlessly; it shows up in the computer's file browser but not in iTunes.
"Use iTunes to Restore" is the iPod's own software declaring itself broken: it means the iPod could not start from its own hard drive, and there is no on-device way around it. Rule the computer out first: the Apple cable in a rear USB port with no hub, a restart, then a second computer if you can — an error number that follows the computer is the computer's. On Windows use iTunes for Windows, or the newer Apple Devices app, and try a clean reinstall of it before blaming the iPod. A deeply drained battery cannot answer the computer at all, so give it time on a charger first.
Then, with the iPod connected, hold Menu + Center until it resets so iTunes can re-detect it. If iTunes stays blind, Disk Mode (reset, then hold Center + Play/Pause) is Apple's own step for an iPod that cannot restore or is not recognized. Any restore, format or initialize erases everything on the iPod, so copy off anything that exists only on it first.
An error number on its own does not identify a failed drive or board. If the errors keep coming on a known-good computer, cable and power source, stop restoring and have the drive, its ribbon cable and the battery checked (the drive cards on the hard-drive page); a red X with clicking underneath is the pattern owners most often traced to the drive. Reported by 14 owners.
My iPod does not appear, iTunes locks up when it connects, two phantom drives show, or the capacity reads wrong after a restore — and can I use it with Windows?
Owners describe it as: iTunes locks up the moment the iPod connects; "Use iTunes to Restore" but iTunes calls it corrupted; two phantom iPod drives appear; the restore succeeds but the capacity looks wrong afterward; wanting Windows use without iTunes; the recovery software file will not download.
"Use iTunes to Restore" is the iPod's own software declaring itself broken: it means the iPod could not start from its own hard drive, and there is no on-device way around it. Recognition checks, in order: the cable (no corroded or bent contacts), a different USB port on the computer itself, and enough charge for the iPod to turn on — a flat battery is never recognized. Then reset (Menu + Center) with it connected, and Disk Mode if iTunes still cannot see it. Froze on the "connected — eject before disconnecting" screen? Slide Hold off and on, then hold Menu + Center until the Apple logo appears; if it freezes on every connection, check the cable, port and storage before syncing again.
Phantom double drives and half-recognized states usually clear with a full restore from Disk Mode, which puts the iPod back to its original state and installs the current software. Any restore, format or initialize erases everything on the iPod, so copy off anything that exists only on it first. Capacity that reads wrong after a restore: on a flash build, check the cards and the adapter setup (the flash storage page); on the stock drive, have the drive tested.
Windows works: use iTunes for Windows, or the newer Apple Devices app, and restore on the computer you intend to sync with. iTunes is the documented sync path for this iPod; we confirm the exact app and setup before giving step-by-step instructions, and we do not publish version-number recipes. Third-party library managers load music day to day for many owners, but they sit on Apple's device format and do not replace the restore when the software breaks.
Where do I download the iPod software? The supported route is a restore: the restore tool fetches and installs this model's software during the restore. We do not point you at separate firmware files or promise a particular version from a download we have not tested; if a restore cannot fetch the software, update the tool and try another port or computer. Reported by 12 owners.
Songs are listed but will not play, or most skip although they play fine on the computer. Is the drive bad?
Owners describe it as: songs appear on the iPod but never start; most tracks skip as if corrupted while the same files play fine in iTunes; the sync dies partway with "required file cannot be found"; the library vanished after iTunes froze mid-operation.
Cheap checks first: the iPod may simply be paused, the volume down, or a maximum volume limit set (Settings > Volume Limit); then slide Hold on and off and hold Menu + Center until the Apple logo. Confirm the source files still play on the computer.
Still skipping: copy off anything that exists only on the iPod, restore from the computer, and resync; let the first sync finish before judging. The copies on the iPod are the casualty — the originals in the library are fine.
If the same failure returns after a clean restore and resync, have the storage and its ribbon cable looked at (the drive cards on the hard-drive page). On a flash-converted unit only, test each card in a card reader with a full-capacity write test — the adapter maker's first suspect for a corrupted library is a bad or fake card; that test says nothing about an original hard drive. Reported by 6 owners.
Music will not land on the iPod, I want the music from the iPod onto a new computer, or I want to wipe a used unit. How?
Owners describe it as: songs "synced" but absent on the iPod; wanting everything wiped off a second-hand unit; needing the songs copied from the iPod to a new computer; deleting songs with a third-party manager locked the screen.
Decide which way the music needs to move before any sync or erase — they are different jobs, and the wrong one erases the only copy.
To the iPod: songs "synced" but absent usually means the sync did not finish or only part of the library is selected — check the sync settings and let it complete, or turn on "Manually manage music and videos" and drag and drop. From the iPod to a new computer: turn automatic sync off before you plug it in, or iTunes will sync over the music already on the iPod. Manual management also lets the iPod work as an external disk so files can be dragged off it — but a file copy alone is not a promise to rebuild songs, artwork or playlists in a new library: the media sits renamed in hidden folders, and protected purchases stay tied to their account. Owners use transfer utilities, or copy the raw folders and re-tag.
Wipe a used unit: copy off anything you want to keep, then connect, select the iPod and Restore — it erases everything and reinstalls the software. A third-party tool that mangled the database leaves a library that lists but will not play: same restore, then reload from a healthy library. Reported by 6 owners.
I fitted a new drive — where does the software come from? And my dropped iPod boot-loops into a restore that never finishes.
Owners describe it as: wanting to load the firmware without letting iTunes fetch it; a dropped unit that got laggy, then boot-looped into a "restore" that will not finish; a restore offered when the media on the iPod must be kept.
After a drive swap the software comes from the restore: enter Disk Mode (reset, then hold Center + Play/Pause), connect, and let iTunes — on Windows, iTunes for Windows, or the newer Apple Devices app — download and install it. A blank new drive shows a red X until that restore. We do not supply or point you at separately downloaded firmware images.
The "restore will delete everything" dilemma: yes, every time. Any restore, format or initialize erases everything on the iPod, so copy off anything that exists only on it first. If the iPod still mounts in Disk Mode, that is the copy route (the recovery question on the hard-drive page).
A restore that never finishes after a drop is a reason to investigate, not to restore again: a drop can unseat the drive ribbon or damage the drive. Run the built-in diagnostics (reset, then Previous + Center as the logo appears), read the drive tests, and see the red-X cards on the hard-drive page. Reported by 3 owners.
How do I wipe everything, clear a forgotten screen-lock combination, or deal with an account that no longer exists?
Owners describe it as: wanting a full factory reset; the iPod "locked" to an email or account that no longer exists.
Three different locks, three answers. Hold: make sure the Hold switch is not set to HOLD — that only locks the buttons. Screen Lock combination (set under Extras): if you cannot remember it, Apple's route is to restore the iPod software and then set a new combination — and a restore erases everything on the iPod.
Account: this click-wheel iPod carries no account lock of the kind modern devices have, and you do not need to create or sign into any account to reset it or to read its files in Disk Mode. What an old account still controls is only the protected purchases bought under it; after a restore the iPod starts fresh with whatever library you sync next.
Full wipe: copy off anything you want to keep, turn automatic sync off if you do not want the old library flowing straight back on, then connect, select the iPod in iTunes (on Windows: iTunes for Windows, or the newer Apple Devices app) and Restore. Reported by 2 owners.
How do I get my music and files off a dying or dead iPod?
Owners describe it as: the drive is failing and the music isn't backed up anywhere; the drive reports full but lists nothing; the board is dead but the drive may be fine; a damaged unit holds a customer's irreplaceable songs.
If it still boots at all: turn automatic sync off before you plug it in, then Disk Mode (reset, then hold Center + Play/Pause) — the computer mounts it like a drive, with no account sign-in involved. Copy everything off before any sync or restore: a sync can replace what is on it, and a restore erases all data, songs, photos and settings included. Media sits renamed in hidden folders; transfer utilities reassemble titles and playlists, or copy the raw folders and re-tag later.
Board dead, drive alive: a bare-drive adapter for this drive's ZIF connector lets a computer read it directly. That can help, but nothing here guarantees songs, photos or playlists come back — and reading some files does not prove the drive is healthy. A clicking drive may fail during the copy, so make one short attempt first; beyond that is specialist recovery. The old sync computer usually still holds everything the iPod ever synced. Reported by 6 owners.
You May Also Want
Use the flash mod path when you want an SD-card or flash-storage upgrade instead of another mechanical drive.
Related: Hard Drive ZIF Ribbon CableInspect or replace the ZIF hard-drive cable before blaming a second storage device.
Related: Replacement Battery (160GB)A weak battery can shut the iPod down when the drive spins up.
Search terms
Some buyers search for "HDD", "1.8-inch drive", "clicking noise", "clicking sound", "hard drive dead", "drive dead", "hard drives", "hard drive failure", "click noise", "click sound", "Flash Mod Problems", "tried charging", "80GB hard drive in a 160GB iPod Classic", "difference between thick and thin", "reformat to use with Windows instead of iTunes", "logic board failed and need data off the hard drive", "skips songs or plays the wrong artist", "not syncing properly", "only loads 8GB of media", "freezes iTunes and won't go into disk mode", "doesn't start up when connected", or "My iPod screen shows www.apple.com/support/iPod"; confirm the checks above point to this same part before ordering. A screen pointing at Apple's iPod support page is a storage error, not a message from us — the iPod could not start from its own drive.
Why people land on this part
Also searched as: iPod classic clicking, 7G-exclusive drive, factory restore iPod, flash drive options, single platter, plugged computer, connected computer, solid state drive, iPod classic 160GB hard drive, HDD, 1.8-inch drive, clicking noise, clicking sound, hard drive dead, ipod classic 7th generation hard drive replacement, Red X Icon, Sad iPod Icon, Folder Icon, Corrupted Data, Stuck in Recovery Mode, iTunes Error, Reboot Loop, Stuck on Apple Logo, Stuck in Disk Mode, Won't Restore, Flash Mod Problems, Hard Drive Failure, restore error, showing a folder, drive was corrupted, drive already corrupted, error 1416, error 1429, click noise, click sound, tried charging, bad sectors, boot loop, click of death, not recognized.
Questions people ask
- Why is my iPod Classic stuck on the Apple logo.
- Can I restore my iPod Classic on Windows 11.
Free diagnostic
Broken iPod? We can help.
Mail us your iPod and we will test it and send you a free repair quote. If you don't like our price, we will ship your iPod back at our expense.