White screen or black screen after reseating
A white screen, black screen, or blank screen belongs here only after the ribbon, latch, power, and storage checks are separated.
Free US shipping on orders of $200 or more
Your iPod:
Get started
Order a repair (or free diagnostic if you're unsure)
Print the work order from your confirmation email
Package up your iPod and ship it to us, or buy our protective box and prepaid shipping label
About the diagnostic: When your iPod arrives, we test it, perform analysis, and send you a free repair quote. If you don't like our price, we will ship your iPod back at our expense.

Representative photo. You receive the part named above.
Used (Apple Original) · Model A1136
$125.90
Sold out
We are not selling this part at the moment.
Part details
Overview
Replacement display assembly for iPod Video 5G. Use it for cracked, blank, lined, or backlight-related display problems after separating screen damage from ribbon seating and board-side faults.
Fitment snapshot
Confirm model, generation, part number, and fitment details before ordering.
This screen listing covers Factory Original LCD Screen (5G) for the exact iPod 5th Generation (Video) fit and physical location.
Use the Compatible Variants table below to confirm capacity, color, case, or order-number fitment.
Use the fitment and inspection checks below before ordering, especially when the same model family has thin/thick case or connector variants.
This part comes in multiple variants. Confirm your iPod's capacity, case depth, and order number before ordering.
For original 2005 5G Video display assemblies.
You're viewing this optionCondition: Used factory-original part. Quantity and exclusions: The listed part, set, pair, or configuration above is supplied with exactly one plastic pry tool. No other parts, tools, adhesives, or materials are included unless they are explicitly listed above.
Fit and specs
| Detail | Value |
|---|---|
| Model Number | A1136 |
| EMC | EMC 2065 |
| Condition | Used — factory original Apple part. Normal cosmetic wear expected. |
| Release family | Original 5G / 2005 |
| Display size | 2.5 inch QVGA 320 x 240 |
| Resolution | 320x240 (QVGA) |
| Type | Color transflective LCD |
| Backlight | White LED |
| Order Number | Capacity | Color | Case | Compatible | Notes |
|---|---|---|---|---|---|
| MA146LL/A | 30GB | Black | thin (0.43 in) | Yes— stock match | Same panel generation |
| MA446LL/A | 30GB | Black | thin (0.43 in) | Yes— compatible (cross-revision) | Owner-verified: Unit is the 5.5G (Late 2006) generation — its like-for-like panel is on the other LCD page; cross-fit reported but panels differ (5.5G panel is the brighter revision) |
| MA452LL/A | 30GB | Black/Red | thin (0.43 in) | Yes— stock match | Same panel generation |
| MA664LL/A | 30GB | U2 Special | thin (0.43 in) | Yes— compatible (cross-revision) | Owner-verified: Unit is the 5.5G (Late 2006) generation — its like-for-like panel is on the other LCD page; cross-fit reported but panels differ (5.5G panel is the brighter revision) |
| MA002LL/A | 30GB | White | thin (0.43 in) | Yes— stock match | Same panel generation |
| MA444LL/A | 30GB | White | thin (0.43 in) | Yes— compatible (cross-revision) | Owner-verified: Unit is the 5.5G (Late 2006) generation — its like-for-like panel is on the other LCD page; cross-fit reported but panels differ (5.5G panel is the brighter revision) |
| MA147LL/A | 60GB | Black | thick | Yes— stock match | Same panel generation |
| MA003LL/A | 60GB | White | thick | Yes— stock match | Same panel generation |
| MA450LL/A | 80GB | Black | thick | Yes— compatible (cross-revision) | Owner-verified: Unit is the 5.5G (Late 2006) generation — its like-for-like panel is on the other LCD page; cross-fit reported but panels differ (5.5G panel is the brighter revision) |
| MA448LL/A | 80GB | White | thick | Yes— compatible (cross-revision) | Owner-verified: Unit is the 5.5G (Late 2006) generation — its like-for-like panel is on the other LCD page; cross-fit reported but panels differ (5.5G panel is the brighter revision) |
Install and repair
For pre-open reset testing, turn Hold off/unlocked. Before opening the case, lock Hold as shown in the repair guide.
Treat case opening as the highest handling risk. Work around the seams gently and stop if the shell, clips, or internal stack resist.
Do not pull the halves apart or side-load board sockets. Reseat nearby ribbons and connectors before blaming a replacement screen.
Open ribbon-cable latches only as described; over-lifting or side-loading the latch can damage the connector. Do not fully separate the case halves until the remaining ribbons are released; the back panel can still be connected by ribbon cables. Reseat and protect the display ribbon during reassembly before assuming the panel itself is bad.
Disassembly guide summary: iPod 5th Generation (Video) Display Replacement.
Before opening the iPod, confirm that the hold switch is locked. With the iPod screen-side down and facing you, the slider should sit all the way to the right.
Do not get discouraged if the iPod takes several opening attempts; work slowly until the case releases. Release the first bottom retainer clip with the plastic opening tool. Point the tool edge toward the metal rear case to avoid scratching the plastic front.
Use these retaining clip locations: four along each side, one on top, and two along the bottom. This helps avoid frustration and reduces the chance of scratching the plastic cover.
Each side of the iPod has four retaining clips. Use a plastic opening tool to separate the plastic front from the metal rear case. Slide the plastic opening tool into the iPod's left side with the tool edge pointed toward the metal rear case. A small guitar pick can help with opening. Place it in the seam and slide it around the case to release the clips more smoothly. Gently enlarge the existing crevice by wiggling the plastic opening tool and moving it to the left. Keep working this way until the entire side of the iPod is loose. Then slide a plastic opening tool to the right of the Hold button. Work very carefully while inserting the tool because the display is fragile.
Gently glide the plastic opening tool on the top of the display, making sure to release the retaining clips. The other sides of the iPod should now release easily. If they do not, work plastic opening tools along the right side the same way you did on the left side. In this step, separate the front of the device from the back about an inch (or a couple of centimeters). The iPod casing is now open, but do not fully separate the two halves yet. Two ribbon cables still connect the back panel to the remaining iPod assembly.
With angled tweezers or a plastic opening tool, slide the brown connector latch upward where it secures the orange battery ribbon cable. Pull from both sides of the latch. Lift it only about 1-2 mm to release the cable; do not lift farther or remove it, or the white connector may come with it. Do not raise the assembly very far; lifting too high could pull the battery connector out of the logic board. If that board connector is damaged, start with board-level service rather than treating the LCD as the fix. Move the brown connector straight upward. It is fragile and can break if shifted to the side. Hooks at the bottom hold the cable in place. If an arm breaks, reinstalling the battery cable becomes difficult; put the cable in the slot and press the brown holder into place to stop the cable from slipping out. Take the cable out of the connector.
At this stage there should be one orange ribbon cable still attaching the front housing to the back. At this stage you are able to take out and replace the blue rubber bumpers, or keep going with separating the case. You can replace the battery without separating the case, but opening it farther can make the work easier. Doing so requires one extra cable removal and adds some damage risk.
Raise the hard drive so the headphone jack ribbon connector is exposed. If the hard drive bumpers come loose, put them back with the notch seated in its original orientation.
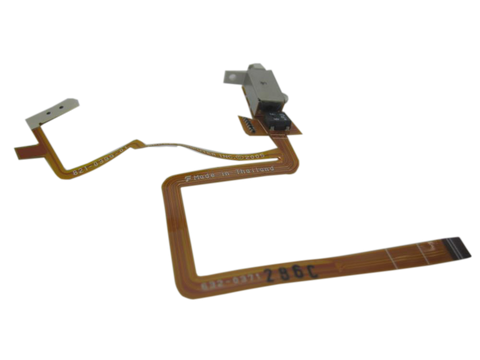
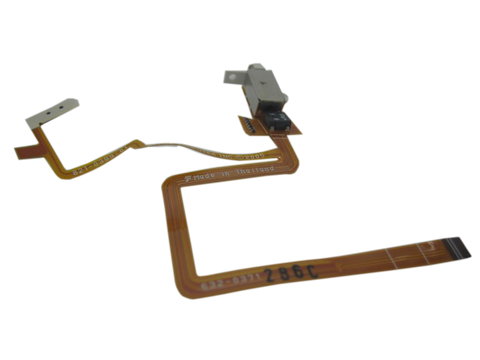
With the plastic opening tool, gently raise the brown tab of the headphone ribbon cable connector. The tab can rotate up 90 degrees, releasing the ribbon cable. With your fingers, draw out the headphone jack ribbon cable.
The front and rear case halves should now be fully separated.
With a small plastic opening tool, release the black hinge clamping the hard drive ribbon cable. Rotate the tab upward 90 degrees toward the logic board to free the ribbon cable. With your forefinger, hold the ribbon cable in place; detach the drive from the ribbon cable. Confirm that the hard drive rubber side bumpers are installed on the drive. Use the side bumper installation guide for placement. If needed, transfer the blue foam padding from the hard drive to the replacement drive.
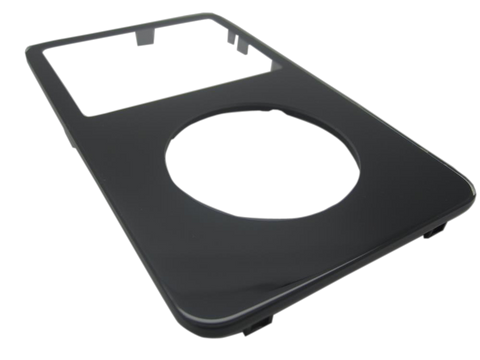
Take out the 3 black Phillips screws securing the front panel to the metal framework. Turn the iPod laterally 180 degrees and take out the three black Phillips screws that secure the front panel to the metal framework on the opposite side.
You may meet some resistance near the center of the device as you will find a mild adhesive used to help hold the two parts together. Carefully work along the iPod edge to separate the front panel from the metal framework. Lift the full framework away from the front panel; it carries the display, logic board, and click wheel. Confirm the click wheel button is seated before reinstalling the framework in the front panel.
The front panel should now be released from the remaining iPod assembly.
In this step, rotate the device so the black plastic tab is more accessible to you. Use a small plastic opening tool or fingernail to lift the black plastic tab that secures the display ribbon. The tab rotates upward 90 degrees toward the display and releases the ribbon cable. Use your finger to prevent the cable from lifting upwards. Rock the display loose from the frame, and next, draw it gently outwards to release the display's ribbon cable. You may have to raise the cable away from the 2 white pegs that poke through it near the side of the frame.
The display should now be released from the remaining iPod assembly. During reassembly, it is usually easier to seat the screen between the front panel and framework before connecting the cable. A new screen cable can be stiff enough to loosen the screen while the cable is being reconnected.
Stop condition: Stop if a connector, latch, screw, clip, housing edge, or the replacement part resists normal alignment. Recheck model fit, orientation, cable routing, and trapped hardware instead of forcing it.
| Check | What to do |
|---|---|
| Test image and backlight | Check the display before closing the case fully, then confirm brightness and image stability after reassembly. |
| Watch for pressure | New spots, lines, or bowing after closing usually means the internal stack or ribbon routing needs another look. |
| Still not working? | Reseat the display ribbon and inspect the connector before treating the replacement screen as bad. |
Troubleshooting
Start here before ordering. Work through the checks in order; a symptom alone does not prove this screen is bad until nearby parts, cables, fitment, or install issues are separated.
| Symptom | What it means & what to check |
|---|---|
| iPod 5th gen dead pixels | Static dead or stuck pixels are a panel fault, not a power fault. Check the display ribbon seating and view a full-white and full-black image; pixels that stay fixed point to the LCD panel itself. |
Use these checks to decide whether this screen is the right part, whether a nearby part should be checked first, or whether the symptom needs more diagnosis.
| Symptom | What it means & what to check |
|---|---|
| Blank, white, black, lined, or backlight display |
What you may see: People describe a blank screen, white or black display, missing backlight, lines, or a display that changes after impact or repair.
Check first: Identify original vs Enhanced before ordering. Original models are 30GB/60GB; Enhanced models are 30GB/80GB and have the brighter screen.
Most likely cause: The 5G was produced in original and Enhanced/5.5G display variants. The Enhanced display is brighter and higher contrast, and display fitment must match the correct variant.
Look elsewhere when: Check ribbon seating, liquid history, and board connector damage before treating the display as a guaranteed fix. |
| Display ribbon, connector, or contact path |
What you may see: People describe symptoms that change after opening the iPod, reseating parts, or disturbing nearby flex cables.
Check first: Inspect the relevant ribbon and board connector before replacing the part.
Most likely cause: The display may be fine while its ribbon, connector, latch, or contact path is loose, dirty, damaged, or not fully seated.
Look elsewhere when: Check the board-side connector or adjacent cable first when the damage is not on the replaceable assembly. |
| Liquid, corrosion, or residue context |
What you may see: Symptoms follow liquid exposure, dirty contacts, corrosion, or residue. Check first: Inspect for liquid, corrosion, residue, torn flex material, or connector damage. Most likely cause: Liquid or corrosion can involve this part, a nearby connector, or a board path. Look elsewhere when: Check the Replacement Battery (Thin — 30GB) when power, charging, runtime, or swollen-battery behavior is the main problem.
|
| Fitment or model-variant mismatch |
What you may see: People ask whether a similar-looking part from another model, capacity, or generation will work. Check first: Match the exact model, generation, capacity, and case style shown for the product.
Most likely cause: This display may help only when it matches the model and variant being repaired.
Look elsewhere when: Check fitment before replacing nearby parts or ordering another copy of the same wrong variant. |
| Symptoms changed after repair or reassembly |
What you may see: People describe a new problem appearing immediately after battery, storage, display, audio, or control work.
Check first: Reopen only as far as needed to inspect the areas touched during the repair.
Most likely cause: A post-repair symptom can involve the display, but disturbed ribbons, latches, grounding, connector seating, or the wrong variant part are common checks before ordering again.
Look elsewhere when: Check the exact connector or assembly disturbed during the repair before treating the new part as failed. |
A white screen, black screen, or blank screen belongs here only after the ribbon, latch, power, and storage checks are separated.
Visible panel damage, lines, dead pixels, or a glitch screen can point to the LCD when connector checks do not clear it.
Confirm the iPod still plays, charges, or syncs so a dead-device symptom is not mistaken for a screen-only failure.
| Situation | Start here instead |
|---|---|
| You see a folder icon, clicking noise, or restore failure | Check the drive or flash media, storage cable, adapter seating, formatting, and restore path before replacing any part. A folder with an exclamation mark means the iPod cannot find its storage — the drive, its ribbon cable, or the software on it; a sad-face iPod and a red X are the same message in other styles. |
| Variant or capacity does not match this listing | Match the exact LCD revision, ribbon, and model variant before ordering. |
| Cable, computer, sync, or port behavior is the primary problem | Start with the dock connector, cable, host, or port checks when sync or port behavior is the main problem. |
| The problem is the Hold switch or headphone jack, not this part | Diagnose the exact-model headphone-jack/Hold assembly and its connector before choosing another part. |
| Recent service or connector disturbance is the main clue | Inspect and reseat the cable, latch, or connector path disturbed during service before buying another part. |
| Charging, swelling, runtime, or power is the primary problem | Start with the battery, charger, and power checks when charging, runtime, swelling, or no-power behavior is the main problem. The battery on this iPod sits behind the display, so a pressure mark on the screen, a bowed or lifted panel, or a case that will not sit flat is a swollen pack — replace the cell before the panel, or the new panel is pressed in turn. |
| The screen goes white when the iPod sits idle and third-party firmware is installed | White at idle after third-party firmware went on? Hold Menu at start-up to boot Apple's own firmware, and restore to stock — see the Restore & sync answers on the storage pages. Order a panel only if the symptom survives that. |
| The controls went dead after the case was open | Controls dead after the case was open? A wheel ribbon, its latch or its ground tab knocked loose during the job is the usual reason — test the scroll ring and all five buttons before you close up, and see the click-wheel page. |
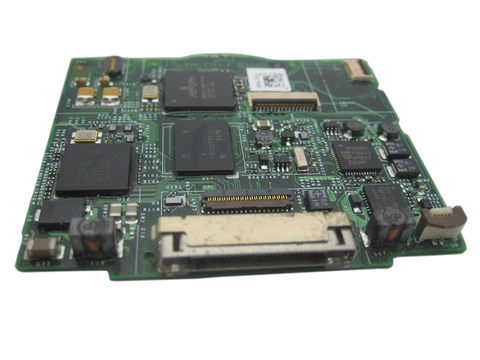
| A symptom points to a different part | Start with battery (thin 30GB) for power/runtime symptoms; hard-drive cable (Toshiba) or (Hitachi) — match the drive brand for folder, clicking, or restore symptoms; LCD screen (Enhanced) for display-only symptoms; headphone jack (thin 30GB) for audio or Hold-switch symptoms; click wheel (white) for click-wheel or control symptoms; logic board — read your board number and memory first; this model has four for board-side damage or multi-system symptoms before buying this part. |
On the iPod 5th Generation Video, Black Screen can describe more than one observable problem. These paraphrased owner reports are anecdotal starting points for diagnosis, not proof that any single part failed.
Anecdotal owner reports (not a guarantee or authoritative proof): - One owner reported a black screen even though the click wheel still clicked; the screen remained blank after trying another drive.
A black screen that survives a restore onto known-good storage points at the display path or the board rather than the storage: if the iPod still plays, syncs or clicks, inspect the display ribbon, its lock and the connector before buying storage again — the exact fault still needs diagnosis.
Owners searching for this describe it as: iPod 5th Generation Video Black Screen, iPod black screen, iPod blank screen.
On the iPod 5th Generation Video, LCD display failure can describe more than one observable problem.
Owners searching for this describe it as: iPod 5th Generation Video LCD display failure, iPod display stays lit, iPod LCD failure.
On the iPod 5th Generation Video, White Screen can describe more than one observable problem.
Owners searching for this describe it as: iPod 5th Generation Video White Screen, iPod white screen, iPod blinking white screen.
These are anecdotal owner reports, not guarantees or authoritative proof that a particular part will fix a symptom. Use them as a troubleshooting starting point: confirm the symptom, run the quick checks, then match the fix.
Owners describe it as: the screen glitches immediately after a battery replacement; the display sits crooked or unanchored; the screen never turns off; fine lines run across the panel.
Check first. The display ribbon. Flip up the black plastic tab that holds it on the board-side connector, re-seat the ribbon square, and close the lock again — a ribbon that looks home can still make partial contact. Then check what went in: a thick 60/80GB battery closed into a thin 30GB case does not sit properly, and a technician on this model traces "won't close, presses the screen" straight back to the wrong-build cell.
What fixes it. Re-seating the ribbon, most often. The correct battery for the case is the other half. Order a panel only once the ribbon, the latch and the battery fit are all cleared — a screen that is being pressed is not a failed screen.
Community signal. Reported by 4 owners.
Questions
Use these questions to narrow the part path before ordering. They keep each answer focused on a different diagnostic or fitment decision.
The display ribbon is held by a black plastic tab that flips up on the board-side connector. When that lock breaks, the ribbon can sit in place without making reliable contact, and the iPod runs on happily — storage spinning, wheel clicking — with nothing on screen.
Check the ordinary explanation first: a blank or abnormal display is usually a loose display cable, so re-seat the ribbon square and close whatever lock remains before concluding anything. With the lock gone, owners hold the ribbon down against the connector; that is a workaround rather than a repair, and pressure applied wrongly damages the flex.
The lock belongs to the board's connector, so a broken one is board-level work or a board replacement. In this case the panel itself is rarely at fault — a screen that has never been shown a signal is not a failed screen. Reported by 1 owner.
This non-custom replacement is factory-original Apple hardware in used condition. Custom-color new exterior parts use separate custom-color pages.
After installing a known-good 5G display, the iPod should show a clear, evenly-lit image. If lines, flicker, or a white screen persist after replacement, reseat the ribbon connector and verify the latch is fully closed before treating the replacement as defective.
Vertical lines, horizontal lines, dead pixels, yellowing, clouding, and dark pressure marks are not all the same failure. Reseat the LCD ribbon first, then separate panel damage, polarizer aging, swollen-battery pressure, and wrong-display fitment before ordering parts.
Reseat the display ribbon and inspect the latch before replacing the LCD. Check whether the iPod still plays or syncs so a display-only symptom stays separate from a dead-device route. Reopen only as far as needed to inspect the areas touched during the repair. Compare the new symptom with what worked before the repair. Check cable seating, latch position, and part variant before replacing a second part.
Inspect the display connector and nearby board area before replacing the screen. Do not treat a new LCD as confirmed when corrosion remains active on the connector or board. Inspect for water or liquid residue, corrosion, and dirty contacts on the part, nearby connectors, and the board-side path. Reseat the display ribbon and inspect the connector before replacing the screen. This screen may help only after the display connector and board-side corrosion risk are controlled.
Apple's 'Classic' branding started with the 6th Generation (2007). This is the iPod 5th Generation (Video) / iPod with Video family, model A1136. Apple's official name for this model is iPod (Video) / iPod with Video.
Choose the 30GB thin or 60GB thick battery by capacity before ordering.
Related: 128GB Flash Mod Kit (flash-storage adapter + 128GB SD Card Included)Flash storage is the common upgrade path while the iPod is already open.
Related: Storage options (30GB thin / 60GB thick)Choose the 30GB or 60GB storage part by capacity and case depth.
Use the checks above to separate this screen from nearby parts before ordering.
Some buyers search for "broken screen", "iPod Video Color Display", "iPod Video 5G display replacement", "Are 5G and 5.5G screens the same", or "I replaced the screen and it still does not work"; confirm the checks above point to this same part before ordering.
Some buyers search for "no backlight"; confirm the checks above point to this same part before ordering.
Some buyers search for "gray horizontal line"; confirm the checks above point to this same part before ordering.
Also searched as: no-backlight after known-good display, backlight not working, backlight failure, silver horizontal line, inverted colors, negative colors, no display, polarizer damage, pressure mark, some vertical lines, washed out, wrong color issues, yellowish glare, dim screen, cracked screen, backlight on lcd, battery caution screen, blank white screen, caution screen flashes, screen flickers, screen is black, screen is white, screen problem, screen with flickering, iPod classic 5th generation white screen, iPod classic 5th generation LCD, iPod video 5th gen factory original LCD screen 5g replacement, ipod video screen repair, ipod video white screen, ipod video lcd, ipod video screen size, replaced screen, dead pixels, 5g lcd, backlight checks, backlight out, black screen but backlight on, iPod video LCD replacement, blank screen, iPod classic 5th generation screen replacement, iPod video screen resolution.
Free diagnostic
Mail us your iPod and we will test it and send you a free repair quote. If you don't like our price, we will ship your iPod back at our expense.