Skip to product information
1 of 1

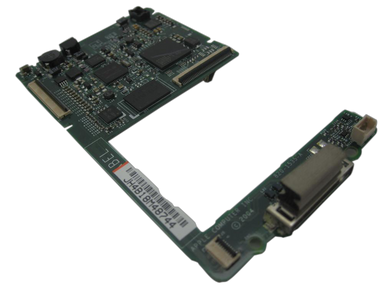
iPod 4G Monochrome — Replacement Logic Board

iPod 4G Monochrome — Replacement Logic Board

Regular price $87.48 USD
Regular price Sale price $87.48 USD
Sale Sold out
Logic Board 20GB / 40GB

Replacement logic board for iPod 4G Monochrome. It ties together power, storage, connection, display, audio, and controls, so use it after the easier connected parts, cables, and connectors have been checked.

Product Overview

This logic board listing covers Replacement Logic Board and its own connector path on the iPod 4th Generation (Monochrome).

Use Part Details for the confirmed part-number reference. Use the Compatible Variants table below to confirm capacity, color, case, or order-number fitment.

Choose this part when your iPod shows Sad iPod Icon, Folder Icon, Physical Damage, or Dropped / Not Working; the checks below help confirm the right part before you order.

If known-good cable, power, storage/ribbon, connection, and restore or Disk Mode checks still fail, the logic board remains a suspect, especially when corrosion or board-side connector damage is visible.

What Is Included

Replacement Logic Board Free plastic pry opening tool 1 year warranty

Quick Buying Check

Buy this when

  • Sad iPod Icon: Use the logic-board check only after battery, storage, display, controls, audio/Hold, dock, and connector assemblies are ruled out on this model.

Diagnose first when

  • LTC4066 enables USB charging — first fullsize iPod with this capability. FireWire charging also supported.

Specifications & Fitment

Part Details

Detail Value
Model Number A1059
EMC EMC 1995
Condition Used — factory original Apple part. Normal cosmetic wear expected.
SoC PortalPlayer PP5020
CPU Dual ARM7TDMI, 80 MHz
RAM 32 MB
PMU NXP PCF50605HN
DC-DC Converter NXP TEA1211HN
Buck Regulator TI LM3485
USB Charger IC LTC4066
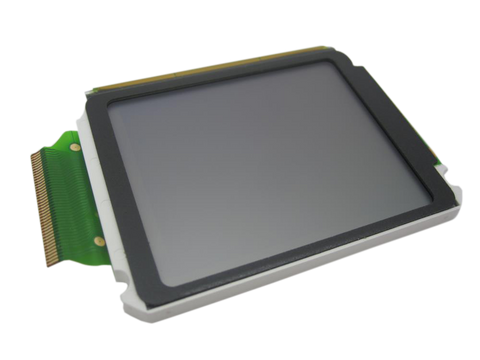
LCD Controller Renesas HD66753
OEM Part 820-1535-A, 820-1723-A, 632-0258-A

Compatible Variants

Order Number Capacity Color Case Compatible Notes
M9787LL/A 20GB Black/Red (U2) thin Yes
M9282LL/A 20GB White thin Yes
PE435A 20GB White (HP) thin Yes
M9268LL/A 40GB White thick Yes
PE436A 40GB White (HP) thick Yes

Diagnostic Failure Cards

Use these model-specific failure cards to decide whether this logic board is the right part, a nearby part needs checking first, or escalation makes more sense after simpler checks.

Check before ordering

Hold, lock, or input state can mimic another failure

What you may notice

  • People describe controls or device behavior that changes with the Hold switch, lock icon, or input state.
  • The iPod appears locked or the Hold switch does not match the device behavior.

Diagnose first when

  • Move the Hold switch and watch whether the lock indicator changes.
  • Check related input or hold-switch assemblies if the symptom began after opening the iPod.
  • Confirm Hold is off before judging the controls.
  • Separate center-button-only failure from a dead scroll ring or multiple failed buttons.
  • Inspect click-wheel ribbon seating, latch position, and ground path after reassembly.
  • Checks before ordering replaceable assemblies, connector seating, and recent repair disturbance before choosing the logic board.

Similar issues to separate

  • The symptom may be routed through the Hold/input path rather than the logic board itself.
  • Click-wheel assembly, button pad, or flex path.
  • This logic board may help only if the symptom remains after hold/input behavior is ruled out.

Where this logic board does not fit

Check another part first

  • Check the Hold switch path first when the device appears locked or ignores input.
  • Check the headphone/hold assembly for confirmed Hold switch faults before blaming the click wheel.

Repair or replacement paths

  • Repair the hold/input path when that switch or ribbon is the confirmed fault.
  • Use logic board replacement only after the hold/input path is ruled out.
  • Replace the click wheel when the assembly or flex remains damaged after seating checks.

Logic Board appears unresponsive or intermittent

What you may notice

  • People describe behavior where the logic board seems dead, intermittent, or only partly responsive.
  • A part or control path is dead, intermittent, or only partly responsive.

Diagnose first when

  • Inspect nearby connectors and flex paths if the iPod has been opened.

Similar issues to separate

  • The logic board can be involved, but connector seating, adjacent cables, power state, or board-side paths can produce similar symptoms.
  • Choose this logic board only when the failing behavior follows the part or its own connection path.

Repair or replacement paths

  • Replace the logic board when inspection or repeat testing points to that assembly.
  • Continue adjacent-part diagnosis when the symptom follows a connector, cable, or board path instead.

Power, charging, or runtime symptoms

What you may notice

  • People describe short runtime, charging trouble, sudden shutoff, or an iPod that will not reliably power on.
  • Short runtime, charging trouble, sudden shutoff, or a device that will not reliably power on.

Diagnose first when

  • Test with a known-good charger and cable before opening the iPod.
  • Note whether the iPod shows charging, briefly powers on, shuts down under load, or never wakes at all.
  • If the symptom began after service, inspect the battery connector and nearby flex paths before replacing another part.

Similar issues to separate

  • The logic board can be the cause, but charging, dock, storage, or board paths can create similar power behavior.
  • Check power / charge / runtime route, connector seating, and board-side damage before ordering.
  • Choose this logic board only when the power, charging, or runtime pattern is tied to this part or its connector path.

Check another part first

  • Check charger/cable behavior, dock connector condition, storage startup clues, and board damage when the symptom is not isolated to battery performance.

Repair or replacement paths

  • Replace the logic board when inspection or repeat testing points to this part as the failing path.
  • Keep dock connector, storage, and board diagnosis in scope when charging behavior is inconsistent or no power path is confirmed.

Symptoms changed after repair or reassembly

What you may notice

  • People describe a new problem appearing immediately after battery, storage, display, audio, or control work.
  • A new symptom appeared after battery, storage, audio, display, or control work.

Diagnose first when

  • Reopen only as far as needed to inspect the areas touched during the repair.
  • Compare the new symptom with what worked before the repair.
  • Check cable seating, latch position, and part variant before replacing a second part.

Similar issues to separate

  • A post-repair symptom can involve the logic board, but disturbed ribbons, latches, grounding, connector seating, or the wrong variant part are common checks before ordering again.
  • Check post-repair regression, connector seating, and board-side damage before ordering.
  • Choose this logic board only when the part itself was torn, creased, or damaged during service.

Check another part first

  • Check the exact connector or assembly disturbed during the repair before treating the new part as failed.

Repair or replacement paths

  • Correct seating, latch, or variant problems first.
  • Replace the logic board when the repair damaged that assembly or its flex path.

Advanced or board-level cases

Blank, white, black, lined, or backlight display

What you may notice

  • People describe a blank screen, white or black display, missing backlight, lines, or a display that changes after impact or repair.
  • Blank screen, white or black display, missing backlight, or lines on the screen.

Diagnose first when

  • Confirm the iPod still plays, charges, or is recognized so the screen symptom can be separated from a dead device.
  • Inspect the display ribbon and connector if the iPod has been opened or dropped.
  • Look for cracks, liquid residue, display discoloration, or connector damage before ordering.
  • Checks before ordering the LCD panel, display ribbon, and connector seating before treating a display-only symptom as logic-board evidence.

Similar issues to separate

  • The logic board can be damaged, but display ribbon seating, connector condition, liquid history, or board-side display circuitry may need checking first.
  • Display / Check backlight route, connector seating, and board-side damage before ordering.
  • Choose this logic board only when the display symptom is tied to this part or its connection path.

Check another part first

  • Check ribbon seating, liquid history, and board connector damage before treating the display as a guaranteed fix. Check the screen and display-ribbon path first when the iPod still powers, plays, charges, or syncs.

Repair or replacement paths

  • Replace the logic board when inspection or repeat testing points to this part's role in the display path.
  • Use display-panel replacement when the panel, backlight, or display flex is visibly damaged; continue connector, liquid-damage, or board diagnosis when the display changes after reseating.

Dock, USB, sync, or charging connection trouble

What you may notice

  • People describe charging, USB recognition, sync, or dock-connector behavior that is intermittent or missing.
  • Charging, USB recognition, sync, or dock behavior is intermittent or missing.

Diagnose first when

  • Try a known-good cable, charger, and computer port before opening the iPod.
  • Inspect the dock connector for debris, bent pins, corrosion, or looseness.
  • Separate charging-only failure from computer-recognition or sync failure when choosing a part.

Similar issues to separate

  • The logic board can be involved, but cable condition, port contamination, battery state, storage behavior, or board damage can create overlapping symptoms.
  • Check dock / usb / sync route, connector seating, and board-side damage before ordering.
  • Choose this logic board only when charging, sync, or dock behavior is tied to this part or its connector path.

Check another part first

  • Check cable, charger, battery, storage restore state, and board condition when the dock path is not clearly isolated.

Repair or replacement paths

  • Replace the logic board when inspection points to this part's role in the dock, USB, sync, or charging path.
  • Continue battery, storage, or board diagnosis when the port looks healthy but power or sync still fails.

Fitment or model-variant mismatch

What you may notice

  • People ask whether a similar-looking part from another capacity, case thickness, or generation will work.
  • A similar-looking part may not match the exact capacity, case thickness, generation, or color.

Diagnose first when

  • Match the exact model, generation, capacity, and case style shown for the product.
  • Do not use a symptom to override fitment: a wrong-variant part can create new symptoms after installation.
  • Inspect for liquid, corrosion, residue, torn flex material, or connector damage.

Similar issues to separate

  • The logic board may differ by model, case style, connector, cable length, bracket, or firmware/storage expectation.
  • Check fitment / model variant boundary, connector seating, and board-side damage before ordering.
  • This logic board may help only when it matches the model and variant being repaired.

Check another part first

  • Check fitment before replacing nearby parts or ordering another copy of the same wrong variant.

Repair or replacement paths

  • Use the logic board variant matched to the exact iPod.
  • Recheck fitment before diagnosing a newly installed part as defective.

Headphone output compared with dock or line-out audio

What you may notice

  • Audio behaves differently through headphones and a dock or line-out accessory.
  • Both headphone and dock output share the same failure.

Diagnose first when

  • Test known-good headphones before opening the iPod.
  • Compare headphone output with dock or line-out audio on the same track.
  • Inspect and reseat the headphone/hold ribbon or connector connection if the iPod was opened.
  • Inspect and reseat the headphone/hold ribbon or connector if the iPod was opened.

Similar issues to separate

  • Headphone jack contacts or headphone/hold assembly.
  • Headphone/hold ribbon, storage-ribbon seating, or board-side connector.

Check another part first

  • If both headphone and dock or line-out audio fail, the jack alone is unlikely.
  • Board-level audio diagnosis belongs after output-path and ribbon checks.

Repair or replacement paths

  • Replace the headphone/hold assembly when the failure is isolated to the headphone path.

Cautions

  • Do not treat a broad no-audio symptom as proof that the headphone jack has failed.
  • Keep this option as advanced or professional diagnosis unless replaceable parts have been ruled out.

Logic Board ribbon, connector, or contact path

What you may notice

  • People describe symptoms that change after opening the iPod, reseating parts, or disturbing nearby flex cables.
  • A symptom starts after opening the iPod or disturbing an internal flex cable.

Diagnose first when

  • Inspect the relevant ribbon and board connector before replacing the part.
  • Look for lifted latches, bent contacts, debris, corrosion, creases, or torn flex material.
  • Check whether the symptom changes after careful reseating.

Similar issues to separate

  • The logic board may be fine while its ribbon, connector, latch, or contact path is loose, dirty, damaged, or not fully seated.
  • Connector seating, ribbon damage, or ground-path issues can involve this part, a nearby connector, or a board path.
  • Choose this logic board only when the part's own flex or contact path is damaged.

Check another part first

  • Check the board-side connector or adjacent cable first when the damage is not on the replaceable assembly.

Repair or replacement paths

  • Reseat or clean only where the repair procedure supports it.
  • Replace the logic board when the flex, connector tail, or assembly contact path is physically damaged.

No sound or missing headphone audio

What you may notice

  • No sound from the headphone jack.
  • Audio disappears while the iPod otherwise appears to run.

Storage warning symptoms usually start with drive or cable checks

What you may notice

  • People may see a sad iPod, red X, folder icon, clicking drive, restore loop, or storage-recognition problem, especially after drive, flash, cable, or board work.
  • Sad iPod, red X, clicking drive, restore loop, or disk-mode trouble.

Diagnose first when

  • Reseat the hard-drive ribbon at both the logic-board end and the drive or adapter end before considering a board replacement.
  • Test with known-good storage and the correct cable or adapter setup, then retry restore or disk mode when available.
  • Inspect the board-side storage connector for torn pins, latch damage, corrosion, or impact damage only after the replaceable storage path has been checked.

Similar issues to separate

  • Most storage-warning symptoms start with the hard drive, hard-drive cable seating, flash adapter setup, formatting, or battery load before they point to the logic board.
  • A logic board becomes a stronger suspect only when a known-good drive or adapter and known-good cable still fail, the board-side storage connector is damaged, or the symptom began immediately after a board swap.
  • Check storage / restore route, connector seating, and board-side damage before ordering.
  • This logic board may help only when the board-side storage connector or storage controller path remains suspect after known-good drive, cable, adapter, power, and restore checks.

Check another part first

  • Check the hard drive, hard-drive cable, flash adapter, formatting, and battery spin-up/load before treating sad iPod, red X, folder, clicking, or restore symptoms as a board failure.
  • Check the hard drive, hard-drive cable or connector ribbon, flash adapter, formatting, and battery spin-up/load before treating sad iPod, red X, folder, clicking, or restore symptoms as a board failure.

Repair or replacement paths

  • Replace the drive, drive cable, or flash adapter first when those checks isolate the storage path.
  • Use logic-board replacement or board repair only when the board-side storage path remains the isolated failure after known-good storage and cable checks.

Liquid, corrosion, or residue context

What you may notice

  • Symptoms follow liquid exposure, dirty contacts, corrosion, or residue.

Similar issues to separate

  • Liquid or corrosion can involve this part, a nearby connector, or a board path.
  • Choose this logic board when the symptom remains isolated to this assembly, its ribbon, or its connector path after first checks.

Check another part first

  • Check the Replacement Battery (All Capacities) when power, charging, runtime, or swollen-battery behavior is the main problem.
  • Check the Replacement Hard Drive (20GB) when storage symptoms such as clicking, sad ipod, folder icons, or restore failure are the main problem.

Fitment and post-repair traps

Fitment and inspection notes

Symptom remains after basic checks

What you may see: The iPod still points back to Replacement Logic Board after cable seating, battery stability, and nearby connector checks.

Check first: Retest with known-good cables or adjacent parts where practical before ordering.

Check next: A nearby cable, connector, battery, storage device, display path, audio path, or board path can mimic a bad logic board.

Symptom changes when touched or reseated

What you may see: The symptom changes after moving the part, reseating a cable, or applying light pressure near the connector path.

Check first: Inspect the connector, latch, flex, solder joints, and nearby board area for damage or corrosion.

Check next: This can still be a connection issue rather than a failed logic board alone.

Problem began after another repair

What you may see: The issue started immediately after opening the iPod, replacing another part, or disturbing an internal cable.

Check first: Reopen only as far as needed and inspect the exact area touched during the previous repair.

Check next: Post-repair symptoms often trace to seating, latch, screw, or cable issues before Replacement Logic Board itself is confirmed bad.

Repair considerations

Repair specialists who work on this model consistently flag these checks before replacing the logic board — they help confirm the logic board is the right fix and not a nearby fault:

  • Escalate board-level soldering or connector damage
  • Replace or professionally rework logic board

Do Not Buy / Problems This Logic Board Does Not Fix

Situation Start here instead
Variant or capacity does not match this listing This is a different model — check your order number and generation before ordering.
A replaceable attached-part path is isolated Test the likely battery, storage, screen, audio, cable, or connector path first.
Recent service or connector disturbance is the main clue Reopen carefully, reseat the part that was disturbed, and inspect its latch before buying a board.
You see a folder icon, clicking noise, or restore failure Use the matching screen, storage, audio, or control part page before replacing the logic board.
The problem is the Hold switch or headphone jack, not this part Start with the headphone jack / Hold switch assembly check.
Only the screen is affected and everything else works Start with the screen, display ribbon, and backlight path before replacing the logic board.
Sound is the only problem Start with the headphone jack / Hold switch assembly check after matching the exact symptom and part family.
Cable, computer, sync, or port behavior is the primary problem Use the nearby battery, storage, screen, audio, cable, or connector listing that matches the symptom first.
Charging, swelling, runtime, or power is the primary problem Start with the battery, charger, port, and power-connector checks before replacing the logic board.

Install Overview

Before You Start

Confirm the model and reset state

Turn Hold off, use the reset sequence for this generation, and confirm the model and variant before opening the iPod.

Open the case slowly

Treat case opening as the highest handling risk. Work around the seams gently and stop if the shell, clips, or internal stack resist.

Protect nearby connectors

Do not pull the halves apart or side-load board sockets. Reseat nearby ribbons and connectors before blaming a replacement logic board.

Separate board failure from replaceable parts

Test known-good replaceable assemblies first so the board is not blamed for a battery, storage, cable, control, screen, or audio path.

Repair Guide

Repair guide summary: iPod 4th Generation or Photo Logic Board Replacement.

Steps13
SolderingNo

After This Repair

Check What to do
Run the full function check Verify power, USB sync, storage, display, audio, controls, and charging before treating the repair as finished.
Still not working? Go back through the connected battery, storage, display, dock, audio, and control paths one at a time.

Worth Knowing

  • Photo logic platform — SoC — dual ARM7TDMI, 80 MHz
  • NXP/Philips PCF50605HN — Power management IC
  • Renesas/Hitachi HD66753 — LCD controller/driver for monochrome display
  • NXP/Philips TEA1211HN — DC-DC boost converter for LCD backlight
  • Texas Instruments LM3485 — Hysteretic PFET buck regulator
  • Linear Technology LTC4066 — USB power manager with Li-Ion charger
  • Wolfson WM8975 — Audio CODEC with headphone amp

Frequently Asked Questions

Use these questions to narrow the part path before ordering. They keep each answer focused on a different diagnostic or fitment decision.

What iPod 4th Generation (Monochrome) models does this fit?

This Replacement Logic Board fits: M9282LL/A (20GB White), M9268LL/A (40GB White), M9787LL/A (20GB Black/Red (U2)), PE435A (20GB White (HP)), PE436A (40GB White (HP)).

Do I need to solder?

No, this installation does not require soldering.

How do I know if this logic board needs replacement?

Symptoms that can point to this logic board include: Sad iPod Icon, Folder Icon, Physical Damage, Dropped / Not Working, Red X Icon. Check fitment, connectors, and nearby parts before treating symptoms as proof.

What else should I replace at the same time?

Logic board replacement often reveals battery issues — inspect during service. Display connector on the logic board should be inspected during replacement.

Can water damage, liquid, or corrosion make this logic board the right repair path?

Look for visible liquid residue, corrosion, burned parts, lifted pads, or damaged board connectors. Do not use a parts swap as the only test when liquid damage is present; clean and inspect the board path first. Choose this logic board only when the failure is isolated to the board path after external and replaceable-part checks. Check the nearby part path first when the symptom still fits a battery, storage, display, dock, headphone/hold, or click-wheel assembly. Board-level rework and component diagnosis belong in advanced or professional repair context.

Why people land on this part

Also searched as: circuit board, logic board worth having repaired, board fried, swap logic, drive logic, accidentally broken, board cable, dead logic board, no power logic board, won't turn on logic board, iPod 4th Generation Monochrome Logic Board, Physical Damage, Dropped / Not Working, Water Damage, motherboard.

  • Genuine Apple Parts
  • One Year Warranty
  • Satisfaction Guaranteed
View full details