
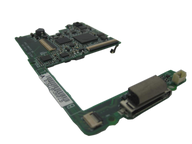
Representative photo. You receive the part named above.
iPod Photo (4th Generation) — Replacement Logic Board (Mid-2005 Color Display)
Used (Apple Original) · Model A1099
$45.95
Also for the iPod Photo: Late 2004 to early 2005 $45.95 · See all
Sold out
Not for sale right now
We are not selling this part at the moment.
- Used (Apple Original). Tested: installed in a working iPod and checked before it ships.
- 1-year limited warranty · 30-day returns from delivery
- Free pry tool in the box
- Completed repairs aren't refundable. If a part we fitted fails within a year, we repair it again.
Part details
About this part
Overview
Replacement logic board for iPod Photo (4th Generation). It ties together power, storage, connection, display, audio, and controls, so use it after the easier connected parts, cables, and connectors have been checked.
Fitment snapshot
Confirm model, generation, part number, and fitment details before ordering.
Product Overview
This logic board listing covers Replacement Logic Board (Mid-2005 Color Display) and its own connector path on the iPod Photo (4th Generation).
Use Part Details for the confirmed part-number reference. Use the Compatible Variants table below to confirm capacity, color, case, or order-number fitment.
Choose this part when your iPod shows Sad iPod Icon, Folder Icon, Physical Damage, or Dropped / Not Working; the checks below help confirm the right part before you order.
If known-good cable, power, storage/ribbon, connection, and restore or Disk Mode checks still fail, the logic board remains a suspect, especially when corrosion or board-side connector damage is visible.
Choose Your Option
This part comes in multiple variants. Confirm your iPod's capacity, case depth, and order number before ordering.
820-1764-A board path. Match board marking and screen revision; the two Photo/Color Display board/screen families are not treated as interchangeable.
You're viewing this optionWhat Is Included
Condition: Used factory-original part. Quantity and exclusions: The listed part, set, pair, or configuration above is supplied with exactly one plastic pry tool. No other parts, tools, adhesives, or materials are included unless they are explicitly listed above.
Quick Buying Check
Buy this when
- Sad iPod Icon: Use the logic-board check only after battery, storage, display, controls, audio/Hold, dock, and connector assemblies are ruled out on this model.
Diagnose first when
- Test the battery, cable, storage, screen, headphone assembly, or dock connector first.
- If the failure appeared right after service, reopen and inspect connector seating before buying a board.
Fit and specs
Which board do I have? Read this before you buy
One board does not fit every A1099. Apple launched the iPod photo on 26 October 2004 in 40GB and 60GB and added a 30GB on 23 February 2005; on 28 June 2005 it merged the lines — in Apple's words, "the iPod and iPod photo lines are merging, creating a single line of white iPods that all feature color displays" — and sold the result as the iPod with color display in 20GB and 60GB. Each family has its own board, and the two are not interchangeable. Both boards carry the same PortalPlayer PP5020C processor and 32 MB of memory, so memory does not separate them: the year, the capacity and the number printed on the board do.
Identify yours in three steps.
- Read the number printed on the board itself, under the LCD ribbon. That is the answer, and it is free. Read the board number under the LCD ribbon: 820-1642-A (the 30/40/60GB iPod photo) takes the late-2004 screen; 820-1764-A (the 20GB and the 2005 60GB iPod with color display) takes the mid-2005 screen — and the same split decides the board.
- Check the order number — it is on the box and Apple's records, not on the case. M9829LL/A and PS492AA (30GB), M9585LL/A (40GB), M9586LL/A and PS493AA (60GB) shipped with the 820-1642-A board. MA079LL/A, MA127LL/A and MA215LL/A (20GB) and M9830LL/A (60GB) shipped with the 820-1764-A board. Both families read A1099 on the back, so the model number on its own decides nothing.
- If the iPod has been apart before, trust the board, not the engraving. A shell or a board swapped by a previous owner carries the wrong story; the printed number is the one thing that cannot be wrong.
This page sells one board and only that board: 820-1764-A, mid 2005, for the 20GB and 2005 60GB iPod with color display units (MA079LL/A, MA127LL/A, MA215LL/A, M9830LL/A). If your board reads 820-1642-A, use the late-2004 logic board listing instead — it covers the 30GB, 40GB and 60GB iPod photo units. The supplier that stocks both boards sells them as not interchangeable, so read the number before you order — the check costs nothing.
Do not use this part for the monochrome fourth-generation iPod (A1059). It looks like the same body, but it is a different platform with its own board — see its own pages.
Specifications & Fitment
Also known as iPod with color display (Apple's official name after June 2005).
Part Details
| Detail | Value |
|---|---|
| Model Number | A1099 |
| EMC | EMC 2022 |
| Condition | Used — factory original Apple part. Normal cosmetic wear expected. |
| SoC | PortalPlayer PP5020C (dual ARM7TDMI, 80 MHz) |
| RAM | 32 MB |
| Audio CODEC | Wolfson WM8975 |
| Video Encoder | Analog Devices ADV7179 (NTSC/PAL) |
| Power Management | NXP PCF50605HN |
| LCD Controller | Renesas HD66789R |
| OEM Part | 820-1764-A |
Compatible Variants
| Order Number | Capacity | Color | Case | Compatible | Notes |
|---|---|---|---|---|---|
| MA127LL/A | 20GB | Black/Red (U2) | thin | Yes— stock match | iPod with color display (820-1764-A era); order number determines the revision |
| MA079LL/A | 20GB | White | thin | Yes— stock match | iPod with color display (820-1764-A era); order number determines the revision |
| MA215LL/A | 20GB | White (Harry Potter Collector's Edition) | thin | Yes— stock match | Harry Potter 20GB Color Display — owner-ruled hardware-identical to MA079LL/A (820-1764-A era) |
| M9830LL/A | 60GB | White | thick | Yes— stock match | iPod with color display (820-1764-A era); M9830LL/A 60GB is the mid-2005 wave |
| M9829LL/A | 30GB | White | thin | No— wrong Photo revision | Owner-verified: 820-1642-A-era unit (iPod photo); revisions are not cross-compatible — use the Late-2004 logic board |
| PS492AA | 30GB | White (HP) | thin | No— wrong Photo revision | Owner-verified: 820-1642-A-era unit (iPod photo); revisions are not cross-compatible — use the Late-2004 logic board |
| M9585LL/A | 40GB | White | thick | No— wrong Photo revision | Owner-verified: 820-1642-A-era unit (iPod photo); revisions are not cross-compatible — use the Late-2004 logic board |
| M9586LL/A | 60GB | White | thick | No— wrong Photo revision | Owner-verified: 820-1642-A-era unit (iPod photo); revisions are not cross-compatible — use the Late-2004 logic board |
| PS493AA | 60GB | White (HP) | thick | No— wrong Photo revision | Owner-verified: 820-1642-A-era unit (iPod photo); revisions are not cross-compatible — use the Late-2004 logic board |
Install and repair
Repair considerations
Run these checks before replacing the logic board — they confirm the logic board is the right fix and not a nearby fault:
- Escalate board-level soldering or connector damage
- Replace or professionally rework logic board
Install Overview
Before You Start
Turn Hold off, then reset: toggle Hold on and off and hold Menu + Select (the center button) for about 10 seconds, until the Apple logo appears. Confirm the model and variant before opening the iPod.
Treat case opening as the highest handling risk. Work around the seams gently and stop if the shell, clips, or internal stack resist.
Do not pull the halves apart or side-load board sockets. Reseat nearby ribbons and connectors before blaming a replacement logic board.
Test known-good replaceable assemblies first so the board is not blamed for a battery, storage, cable, control, screen, or audio path.
Disassembly Guide
Show all 13 installation steps
Before you open the iPod, confirm that the hold switch is in the locked setting. The orange bar should be showing, indicating hold is active.
Move an opening pick as far as possible into the gap between the plastic front and the metal back panel, on the right edge of the iPod. You may have to rock the pick back and forth to move it in farther. With the opening pick, lever up against the plastic front panel and release 5 retaining tabs. Slide the pick along the iPod edge and keep levering gently until the remaining retaining tabs release. In this step, after all five tabs along the right edge are free, the case should easily open.
The iPod case is now open, but do not separate the two halves yet. An orange ribbon cable still connects the headphone jack to the logic board. With the dock connector edge at the top, open the case like a book and set the rear panel beside the iPod front half.
With a plastic tool or your fingernails, carefully detach the orange headphone jack cable. Make sure to draw straight up on the connector, not the cable itself. This fragile ribbon cable can stay connected for a battery replacement. Prop and tape the rear case against a box so the headphone jack remains connected to the motherboard without straining its cable while you work.
Grasp the hard drive with one hand and carefully detach the orange ribbon cable from the hard drive with your other hand. In this step, if the cable doesn't come free easily, it may be useful to gently wiggle the cable from side to side.
Peel up and back the black adhesive strip covering the hard drive ribbon cable.
With a fingertip or spudger, carefully flip up the black hard drive cable connector on the logic board. The black retaining clip rotates 90 degrees toward vertical in the cable direction.
Draw the orange hard drive cable directly out of its connector.
Carefully detach the white battery connector from the logic board. Pull only on the connector housing, not the cables.
With a spudger, flip up the black retaining bars holding the display and click wheel connectors to the logic board. On an iPod Photo, the display connector sits more centrally on the logic board.
Take out the black T6 Torx screws holding the logic board to the front panel. On this iPod there are 5, not the 6 the shared guide picture shows — there is no screw in the top right corner.
Move the orange click wheel ribbon cable out of its connector. Unlock this connector first: the locking mechanism sits on the opposite side of the cable entry and swivels upward 90 degrees. Lift the locking mechanism with a plastic spudger.
Carefully raise the large end of the logic board, then detach the display connector. Raise the logic board out of the iPod.
Product-specific placement, reassembly, and check
- Prepare and access. Confirm the exact model and listing fit first. Use the existing steps as a disassembly guide, gather the specified tools, disconnect power where applicable, and keep screws and cable positions organized.
- Place Replacement Logic Board (Mid-2005 Color Display). Seat the display in its original frame position and insert the display cable evenly without pressing on the image area.
- Reassemble without force. Reverse only the access steps needed for this repair, keep cables clear of case edges and screw posts, and close clips in stages.
- Validate before final closure. Before final closure, confirm image, backlight, and controls, and check that no cable or frame edge creates pressure on the panel.
Stop condition: Stop if a connector, latch, screw, clip, housing edge, or the replacement part resists normal alignment. Recheck model fit, orientation, cable routing, and trapped hardware instead of forcing it.
After This Repair
| Check | What to do |
|---|---|
| Run the full function check | Verify power, USB sync, storage, display, audio, controls, and charging before treating the repair as finished. |
| Still not working? | Go back through the connected battery, storage, display, dock, audio, and control paths one at a time. |
Troubleshooting
Diagnostic Failure Cards
Use these model-specific failure cards to decide whether this logic board is the right part, a nearby part needs checking first, or escalation makes more sense after simpler checks.
| Symptom | What it means & what to check |
|---|---|
| Symptom remains after basic checks |
What you may see: The iPod still points back to Replacement Logic Board (Mid-2005 Color Display) after cable seating, battery stability, and nearby connector checks. Check first: Retest with known-good cables or adjacent parts where practical before ordering. Check next: A nearby cable, connector, battery, storage device, display path, audio path, or board path can mimic a bad logic board. |
| Symptom changes when touched or reseated |
What you may see: The symptom changes after moving the part, reseating a cable, or applying light pressure near the connector path. Check first: Inspect the connector, latch, flex, solder joints, and nearby board area for damage or corrosion. Check next: This can still be a connection issue rather than a failed logic board alone. |
| Problem began after another repair |
What you may see: The issue started immediately after opening the iPod, replacing another part, or disturbing an internal cable. Check first: Reopen only as far as needed and inspect the exact area touched during the previous repair. Check next: Post-repair symptoms often trace to seating, latch, screw, or cable issues before Replacement Logic Board (Mid-2005 Color Display) itself is confirmed bad. |
| Hold, lock, or input state can mimic another failure |
What you may notice
Diagnose first when
Similar issues to separate
Where this logic board does not fit
Check another part first
Repair or replacement paths
|
| Logic Board appears unresponsive or intermittent |
What you may notice
Diagnose first when
Similar issues to separate
Repair or replacement paths
|
| Power, charging, or runtime symptoms |
What you may notice
Diagnose first when
Similar issues to separate
Check another part first
Repair or replacement paths
|
| Symptoms changed after repair or reassembly |
What you may notice
Diagnose first when
Similar issues to separate
Check another part first
Repair or replacement paths
|
| Blank, white, black, lined, or backlight display |
What you may notice
Diagnose first when
Similar issues to separate
Check another part first
Repair or replacement paths
|
| Dock, USB, sync, or charging connection trouble |
What you may notice
Diagnose first when
Similar issues to separate
Check another part first
Repair or replacement paths
|
| Fitment or model-variant mismatch |
What you may notice
Diagnose first when
Similar issues to separate
Check another part first
Repair or replacement paths
|
| Headphone output compared with dock or line-out audio |
What you may notice
Diagnose first when
Similar issues to separate
Check another part first
Repair or replacement paths
Cautions
|
| Logic Board ribbon, connector, or contact path |
What you may notice
Diagnose first when
Similar issues to separate
Check another part first
Repair or replacement paths
|
| No sound or missing headphone audio |
What you may notice
|
| Storage warning symptoms usually start with drive or cable checks |
What you may notice
Diagnose first when
Similar issues to separate
Check another part first
Repair or replacement paths
|
| Liquid, corrosion, or residue context |
What you may notice
Similar issues to separate
Check another part first
|
| Fitment and inspection notes |
|
Do Not Buy / Problems This Logic Board Does Not Fix
| Situation | Start here instead |
|---|---|
| Only the screen is affected and everything else works | Start with the screen, display ribbon, and backlight checks for your model before buying this part. |
| Variant or capacity does not match this listing | Use the correct capacity or case-depth listing instead. |
| A replaceable attached-part path is isolated | Test the likely battery, storage, screen, audio, cable, or connector path first. |
| Recent service or connector disturbance is the main clue | Reopen carefully, reseat the part that was disturbed, and inspect its latch before buying a board. |
| You see a folder icon, clicking noise, or restore failure | Check the drive or flash media, storage cable, adapter seating, formatting, and restore path before replacing any part. |
| The problem is the Hold switch or headphone jack, not this part | An iPod that stays locked, or ignores the controls while the lock icon disagrees with the slider, is a Hold-path problem. On this iPod the Hold switch belongs to the headphone-jack assembly, not the board and not the wheel: check that the outer slider actually moves the internal switch, then choose the assembly that matches your case — thin (20/30GB) or thick (40/60GB). |
| Sound is the only problem | Start with the headphone jack / Hold switch assembly check after matching the exact symptom and part family. |
| Cable, computer, sync, or port behavior is the primary problem | Use the nearby battery, storage, screen, audio, cable, or connector listing that matches the symptom first. |
| A car stereo will not see the iPod over USB | Owners report modern car USB ports answering "unsupported version", or doing nothing at all, with this iPod. It syncs and charges over USB with a computer, so a car port that refuses it is an accessory-support limit in the car, not a fault in the iPod, and no software update bridges it — use the car's aux input or a dock/line-out cable instead. Do not buy a board for this. |
| The iPod cycles Apple logo → sad face → low battery after a battery swap | That pattern is a battery-and-storage question before it is a board one. Give it a long charge on a wall adapter, reseat the battery plug and the hard-drive cable at both ends, and only then look at the board. |
| Charging, swelling, runtime, or power is the primary problem | Start with the battery, charger, port, and power-connector checks before replacing the logic board. |
Worth Knowing
- Photo logic platform — SoC — dual ARM7TDMI, 80 MHz
- Wolfson WM8975 — Audio CODEC — stereo DAC with headphone amp
- Analog Devices ADV7179 — Video encoder — NTSC/PAL composite video output
- NXP/Philips PCF50605HN — Power management IC — battery charging, voltage regulation
- Renesas/Hitachi HD66789R — LCD controller/driver for 220x176 color TFT
- NXP/Philips TEA1211HN — DC-DC boost converter for LCD backlight
- Texas Instruments LM34910 — Wide input range buck regulator (up to 36V input)
- Texas Instruments LM3485 — Hysteretic PFET buck regulator
- Linear Technology LTC4066 — USB power manager with Li-Ion charger
What Owners Report
These are anecdotal owner reports, not guarantees or authoritative proof that a particular part will fix a symptom. Use them as a troubleshooting starting point: confirm the symptom, run the quick checks, then match the fix.
Computer won't see the iPod — cable, port, or the iPod itself?
Symptoms. The computer doesn't recognize the iPod though it plays fine on its own; "do not disconnect" flashes then drops back to the menu; a modern Mac has no FireWire 400 port to sync through and USB doesn't seem to connect.
Quick diagnosis.
- Eliminate the USB path in order: test another device (a flash drive) in the same port — if it works, the computer is fine. Then try a different cable, ideally a borrowed known-good one. Only after both pass does suspicion move to the iPod.
- If the cable and port pass, inspect the iPod-side 30-pin socket for bent or dirty contacts and clean it. The socket is soldered to the logic board and is not sold as a separate part, so damage beyond cleaning escalates to board-level work.
- Try disk mode before blaming the board: reset with Menu + Select, then hold Select + Play. Apple's own step for an iPod that will not restore or is not recognized is to use disk mode.
- Software, not drivers: there are none to chase. Use iTunes for Windows, or the newer Apple Devices app, on a PC, and Finder on recent macOS.
- On modern machines: this iPod syncs and charges over both USB 2.0 and FireWire, so a Mac with no FireWire port is not a dead end.
Fixes.
- Cable replacement — the most common outcome of the elimination ladder, and the cheapest.
- Logic board — where the socket itself is loose, corroded or torn: the port comes off with the board, and matching the board revision to your unit is what makes the swap work.
Cautions.
- One owner's connector fix in this thread family came from a later-generation unit — shared mechanics, not evidence about this model.
Community signal. Reported by 2 owners.
Sad face or boot loop that survives part swaps
Symptoms. After a drive replacement: folder-with-exclamation, boot cycling through logo → folder → "do not disconnect"; a 60GB unit with a detached drive connector and a burned component near the 30-pin connector that still won't start after part swaps; a sad face that persisted through battery, drive AND board replacements; stuck on the Apple logo, no disk mode; a drive that whirs, swells in volume, cuts off and retries before finally reaching the menu.
Quick diagnosis.
- After any drive swap, verify the work first: enter the diagnostic screen — reset with Menu + Select, then hold Previous + Select as the Apple logo appears — confirm the drive is seen, and re-check the drive cable seating. A boot cycle with the folder icon usually means the iPod cannot read its software off the drive — drive, cable, or an unfinished restore.
- Use your ears. Loud clicking or grinding points at a failing drive; silence points at a drive getting no power, and the community's first move there is the drive cable, not the drive.
- Inspect the ribbon for tears and bent pins, and test the drive itself through a 50-pin USB adapter before condemning anything else.
- When symptoms survive battery + drive + board swaps, revisit the simplest links: cable seating and connector orientation are the classic misses — and remember the restore may need wall power to finish. Copy anything you want to keep off the iPod first — a restore erases it — and use iTunes for Windows, or the newer Apple Devices app, on a PC.
- Board-level burn damage: there are no public schematics for this model, so component-level diagnosis is guesswork even for professionals. The community path is whole-board replacement.
Fixes.
- Hard drive replacement (with a restore afterwards) — the standard answer to sad-face and clicking presentations; a flash conversion is the popular modernisation at the same step.
- Drive cable replacement — cheap insurance when boot cycling follows a drive swap, and the first part to change when the drive is silent.
- Logic board replacement — for burned or board-level failures; match the board revision to your unit (late-2004 or mid-2005).
Cautions.
- One thread in this family is a monochrome-sibling unit — shared mechanics, not color-model evidence.
- Don't chase burned components with a soldering iron on this model — no schematics means no reliable repair map.
Community signal. Reported by 4 owners, plus one owner's whirring-and-retrying boot.
Questions
Frequently Asked Questions
Use these questions to narrow the part path before ordering. They keep each answer focused on a different diagnostic or fitment decision.
What iPod Photo (4th Generation) models does this fit?
This Replacement Logic Board (Mid-2005 Color Display) fits: MA079LL/A (20GB White), MA127LL/A (20GB Black/Red (U2)), M9830LL/A (60GB White), MA215LL/A (20GB White (Harry Potter)).
Do I need to solder?
No, this installation does not require soldering. Difficulty: Moderate. Estimated time: 30 minutes.
How do I know if this logic board needs replacement?
These symptoms require exact-model diagnosis first; consider the logic board only after power, storage, cable, display, audio, and control checks isolate a board fault. Check fitment, connectors, and nearby parts before treating symptoms as proof.
How should I use power, charging, or runtime symptoms to choose this logic board?
Check battery variant, battery connector, FireWire power, charger/cable behavior, and storage spin-up load before board replacement. Board diagnosis is stronger when the iPod remains dead or unstable after known-good battery, cable, dock, and storage checks. Test with a known-good charger and cable before opening the iPod. Note whether the iPod shows charging, briefly powers on, shuts down under load, or never wakes at all. If the symptom began after service, inspect the battery connector and nearby flex paths before replacing another part.
Is this an iPod Classic?
Apple's 'Classic' branding started with the 6th Generation (2007). This is the color-screen iPod photo / iPod with color display generation, not a Classic-branded model.
Can a worn dock socket be repaired?
One owner's iPod lived plugged into a vehicle stereo for years; after enough bumps the cable no longer holds a reliable connection, and the question is whether the port can be reinforced. There is nothing to reinforce: the 30-pin socket is soldered to the logic board and is not sold as a separate part, so try a known-good cable first — a worn cable end is far more common than a worn socket, and it is the cheap test. If a fresh cable seats firmly in another iPod but still wobbles in yours, the socket itself is the fault, and the repair is a board: it comes away with the board in every teardown of this model. Match the board revision to your unit before ordering.
The jack socket tore off the board — can it be soldered?
This happens when the back is pulled away without first freeing the orange headphone-jack ribbon: the socket comes off the board, connector and all. Pads torn off a board are board-level rework rather than a part you can fit, and one repairer's verdict on this many fine pins is that a replacement board is the realistic route — match the revision to your unit. Before ordering one, check what actually tore: if the board-side socket is intact and the damage is in the ribbon, an owner of a 60GB unit on the 820-1642-A board recovered by fitting a donor headphone-jack flex cable, noting the donor carried a different printed number but the right connector — so match the connector as well as the number. The way not to meet this at all is in the case-opening card: open the case like a book and never lift the back away.
Could another part cause the same symptom?
Use the Quick Buying Check, Failure Signs, and Do Not Buy sections together before ordering. The symptom should still point to this logic board after nearby parts and fitment are separated.
You May Also Want
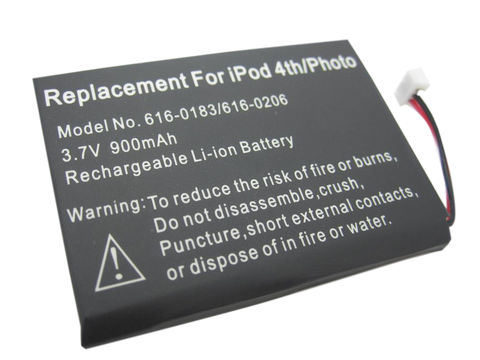
A fresh battery is often replaced during the same repair while the iPod is open.
Related: Flash Mod Service (installed by iMods)Flash storage upgrade replaces the mechanical drive on either case depth.
Related: Replacement Hard Drive (20GB)Thin-case 20GB storage option for Color Display bodies that use the smaller drive.
Search terms
Why people land on this part
Some buyers search for "Won't Restore", "wont sync", or "wont charge with new battery"; confirm the checks above point to this same part before ordering.
Also searched as: ipod photo 4th generation logic board replacement, Physical Damage, Dropped / Not Working, dead logic board, no power logic board, won't turn on logic board, motherboard, circuit board, swap logic, board fried, where to buy iPod Photo logic board mid 2005, iPod Color Display logic board repair, iPod Colour Display, where to buy iPod Photo logic board online, iPod Photo logic board kit cost, iPod Photo logic board for sale, iPod Photo parts store, iPod 4th generation Photo logic board mid 2005 color display, Won't Restore.
Free diagnostic
Broken iPod? We can help.
Mail us your iPod and we will test it and send you a free repair quote. If you don't like our price, we will ship your iPod back at our expense.
How mail-in repair works
Order the free diagnostic
Choose your iPod. Add our shipping box and prepaid label if you need one.
Mail us your iPod
Pack it with your work order. No printer? Put a note in the box with your name, return address, email, order number and what is wrong.
Approve your quote
We test it and email your free repair quote. Most repairs are finished within 3 to 5 business days after you approve the quote.